
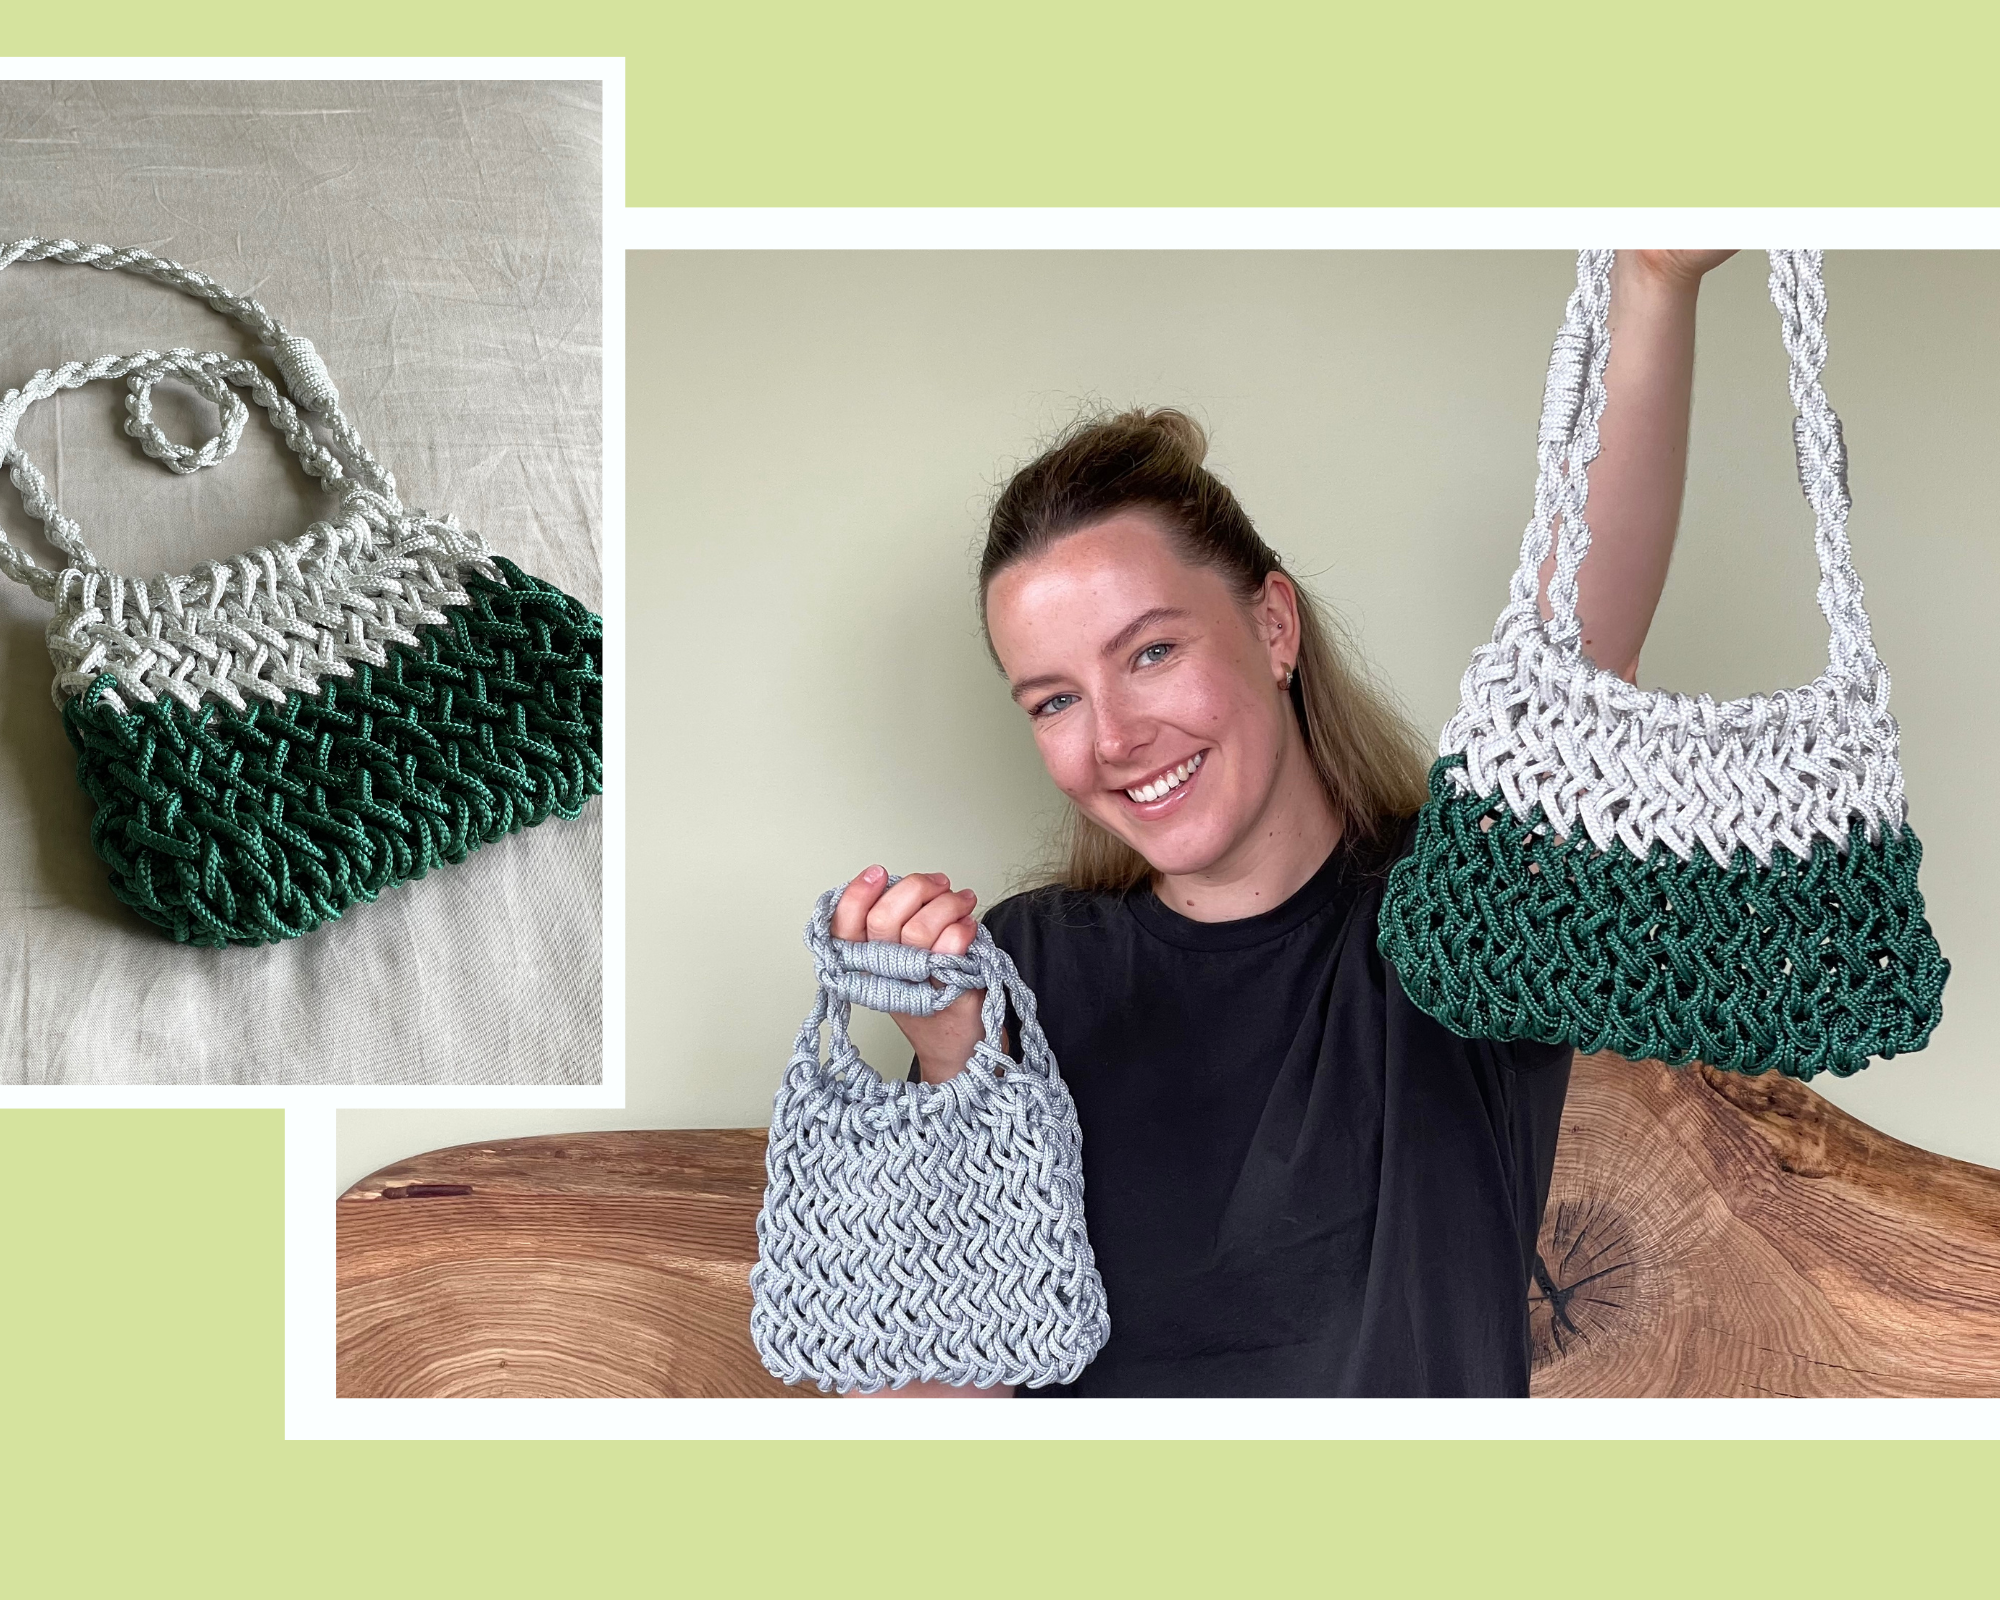
Knitted Rope Bag: Craft a Stunning DIY in Under 2 Hours
Are you looking for a quick and stylish DIY project? This chic knitted rope bag is the perfect blend of simplicity and elegance, and the best part is—it can be made in just 2 hours! Whether you’re using laundry rope for a clean, minimalist look or climbing rope for a more rugged, textured finish, this easy design will turn heads. Perfect for beginners and seasoned crafters alike, this bag is the ultimate accessory for your next casual outing or weekend getaway. Ready to get started? Grab your rope and let’s knit something fabulous!
Sizing
The size of the bag we are making today is 15 cm x 23 cm (5.9″ x 9″).
The handle length is around 30 cm or 11.8″.
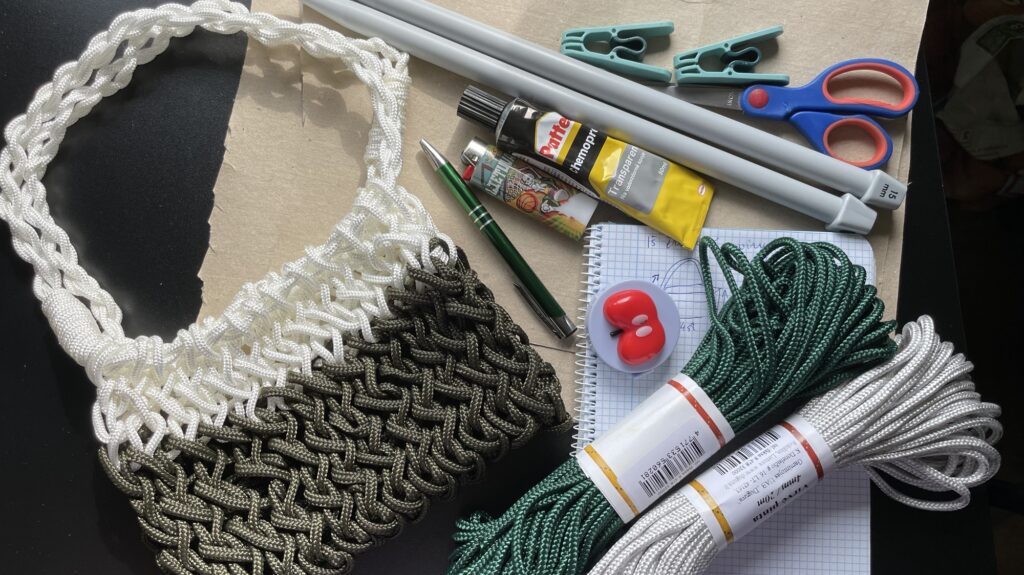
Materials for The Knitted Rope Bag
Here you will see a list of materials needed to make one bag:
- ~ 40 meters (44 yards) of polyester rope 4 mm
- Knitting needles 15mm
- Lighter
- Contact glue (transparent)
- Scissors
- Laundry clips
- Measuring tape
- Notes
- Paper table cover
- Clothes hanger or S-shaped hook


Design Process
To achieve a bag of this size (15 cm x 23 cm or 5.9″ x 9″), you will need to create 14 stitches in length and 14 rows in height.
The rope bag can be either single-colored or multicolored, depending on your preference. In this guide, I’ll demonstrate a two-color bag to explain the color change. The color pattern will be 9 rows of green rope followed by 5 rows of light grey, with the handles also in grey.
The bag consists of the following parts:
- 2 pieces for the body of the bag
- 2 straps for the handles
In order to make a larger bag, simply add about 10 cm of rope for each additional stitch. For example, if you want your bag to be longer and have more of a baguette shape, add 2 extra stitches to the initial foundation chain. For a bag with the same height (14 rows), this would mean adding 28 more stitches in total, requiring an additional 2.8 meters of rope.
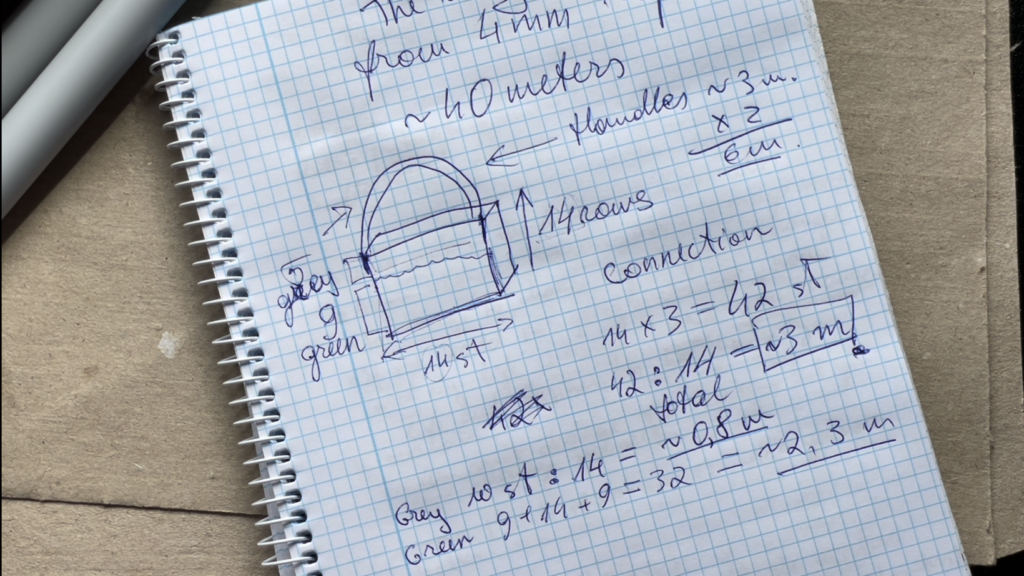
Connection of The Knitted Rope Bag
We need to prepare enough rope to connect all the necessary stitches. We have a total of 14 stitches, which will be multiplied by 3 (to account for connecting the two sides and the bottom). This gives us 42 stitches in total. To determine the exact length of rope needed, we’ll use a coefficient of 14 (a factor that works well). By dividing 42 by 14, we find that approximately 3 meters of rope is required to connect all three sides.
Since we’re making a two-colored bag, we’ll need to calculate the rope length for each color separately.
For the grey rope: We have 10 stitches (5 on each side), divided by 14, which gives us approximately 0.8 meters of rope.
For the green rope: We have 9 stitches on each side, plus 14 stitches for the bottom, totaling 32 stitches. Dividing this by 14, we get approximately 2.3 meters of rope.
The Handles of The Rope Bag
In addition, we’ll need two straps for the handles. For each strap, cut 3 meters of rope, totaling 6 meters. This will create handles that are 25 cm long. If you have extra rope, you can cut each piece to 3.5 meters, which will give you handles with a length of 30 cm.
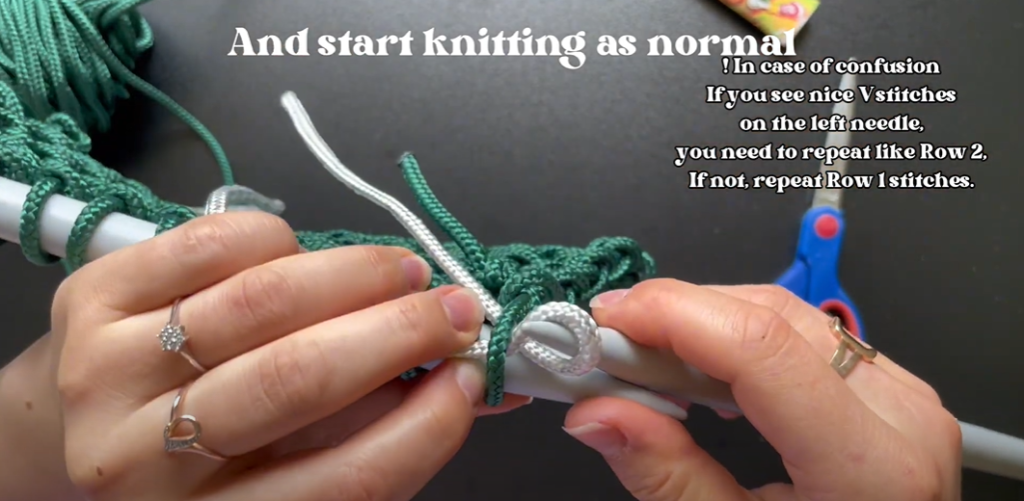
Let’s start knitting
Cast on
Firstly, to begin the foundation stitches, start with a slip knot and place it directly onto one of your knitting needles. Then, cast a total of 14 stitches onto the needle, including the initial slip knot as the first stitch.
The Knitted Rope Bag Stitch
Furthermore, the stitch used for The Rope Bag is the Stockinette Stitch, which alternates between two rows: one purl row and one knit row. (For detailed instructions, check out the video tutorial)
Row 1: Purl across
Row 2: Knit across
Row 3: Purl across
Repeat these two rows until you have 9 rows in total because it will be the time to change the color.
Change the color
Before beginning working on Row 10 prepare the other colored rope. Leave a tail of 10-15 cm and start pulling loops and knitting with it. After making a few stitches you can stop and make a knot with the end you left to secure it. Cut the first colored rope and make a knot too. Continue knitting until you reach Row 14.
Finish The Bag Body
After making enough rows for your bag body, finish the piece in this order:
- Cut the rope by leaving a tail of 10-15 cm
- Make a knot to secure the rope
- Prepare any leftover rope more than 25 cm in length
- Carefully take out the needle
- Push the rope you prepared through all the stitches very gently
- Make a knot with the rope you just went through
After this, prepare another bag body piece in the same way.
Handles for The Knitted Rope Bag
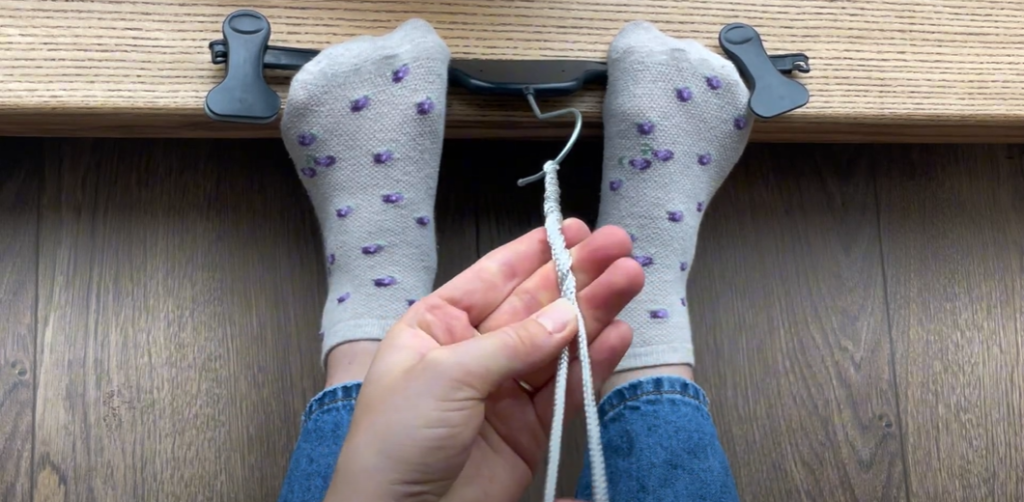
To make the handles, you’ll need a clothes hanger or an S-shaped hook and two pieces of rope, each 3 meters long. Find a comfortable position to hold the hanger, either by attaching it to a table or securing it with your feet (as I do). It’s important to keep tension while making the handles.
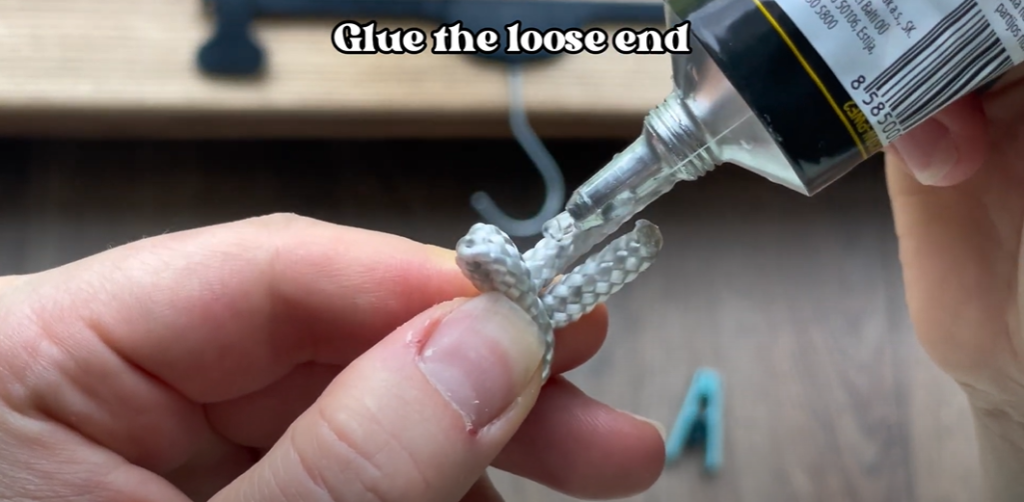
Fold one piece of rope in half and hook it onto the hanger. Twist each strap tightly until you reach the end. Then, fold the twisted rope in half again and release the folded side while holding the ends. As a result, if you maintained enough tension, the rope should naturally braid itself. If not, help it by twisting it with your hand. Once the curls are evenly twisted, remove the rope from the hook. Following, glue the loose ends and secure them with a laundry clip. Leave to dry for 10-15 minutes.
After that repeat the same with another rope.
Attach the handles
Once the handles are dry, remove the clips and carefully insert the handle straps in place of the rope that was securing the stitches. Do this gently to avoid loosening any stitches.
In addition, to form round handles, glue the two ends of each strap together and secure them with a clip. Leave to dry for 10-15 minutes. Repeat the process with the other handle.
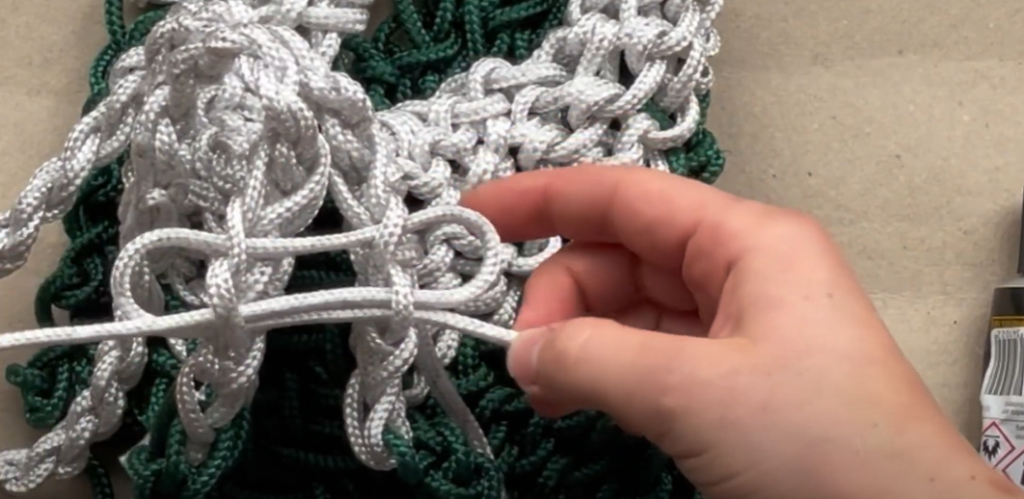
Connecting The Knitted Rope Bag
Work from the wrong side of the bag (whichever side you prefer; I chose the purl bump side) and connect the stitches by threading through the middle of each stitch, pulling tightly. (See the attached photos for reference, and watch the video for detailed instructions)
Secure The Rope Bag Handles
Next, to reinforce the area where the handles are glued (the weakest point), you need to wrap it and glue it again. For this step, use two straps of rope, each about 40-50 cm long. Glue one end of the strap at the spot where the handles are attached, and start wrapping the rope around, adding glue as you go to ensure a firm bond. Wrap it tightly to strengthen the area, usually making 8-10 full circles or until the area is fully covered. Leave a 2-3 cm tail of rope before finishing, and push this tail down into the wrapped area with some extra glue. Afterward, ensure all the circles are glued together; add more glue between them if necessary. Let it dry completely, then repeat the process with the other handle.

Weave in the loose ends
Moreover, secure all loose ends by tying a knot. Apply some glue to these knots, then melt the ends with a lighter and quickly press the melted ends against the bag. Repeat this process with all the tails you left. (BE VERY CAREFUL WHEN USING A LIGHTER) Leave it to dry.
FINISHING
Finally, if the glue has already dried, turn the bag inside out. Stretch it to give it more shape. And your Knitted Rope Bag is complete!
You did a great job on making your Knitted Rope Bag!
I hope you enjoyed it and wish you happy DIY’ing!