
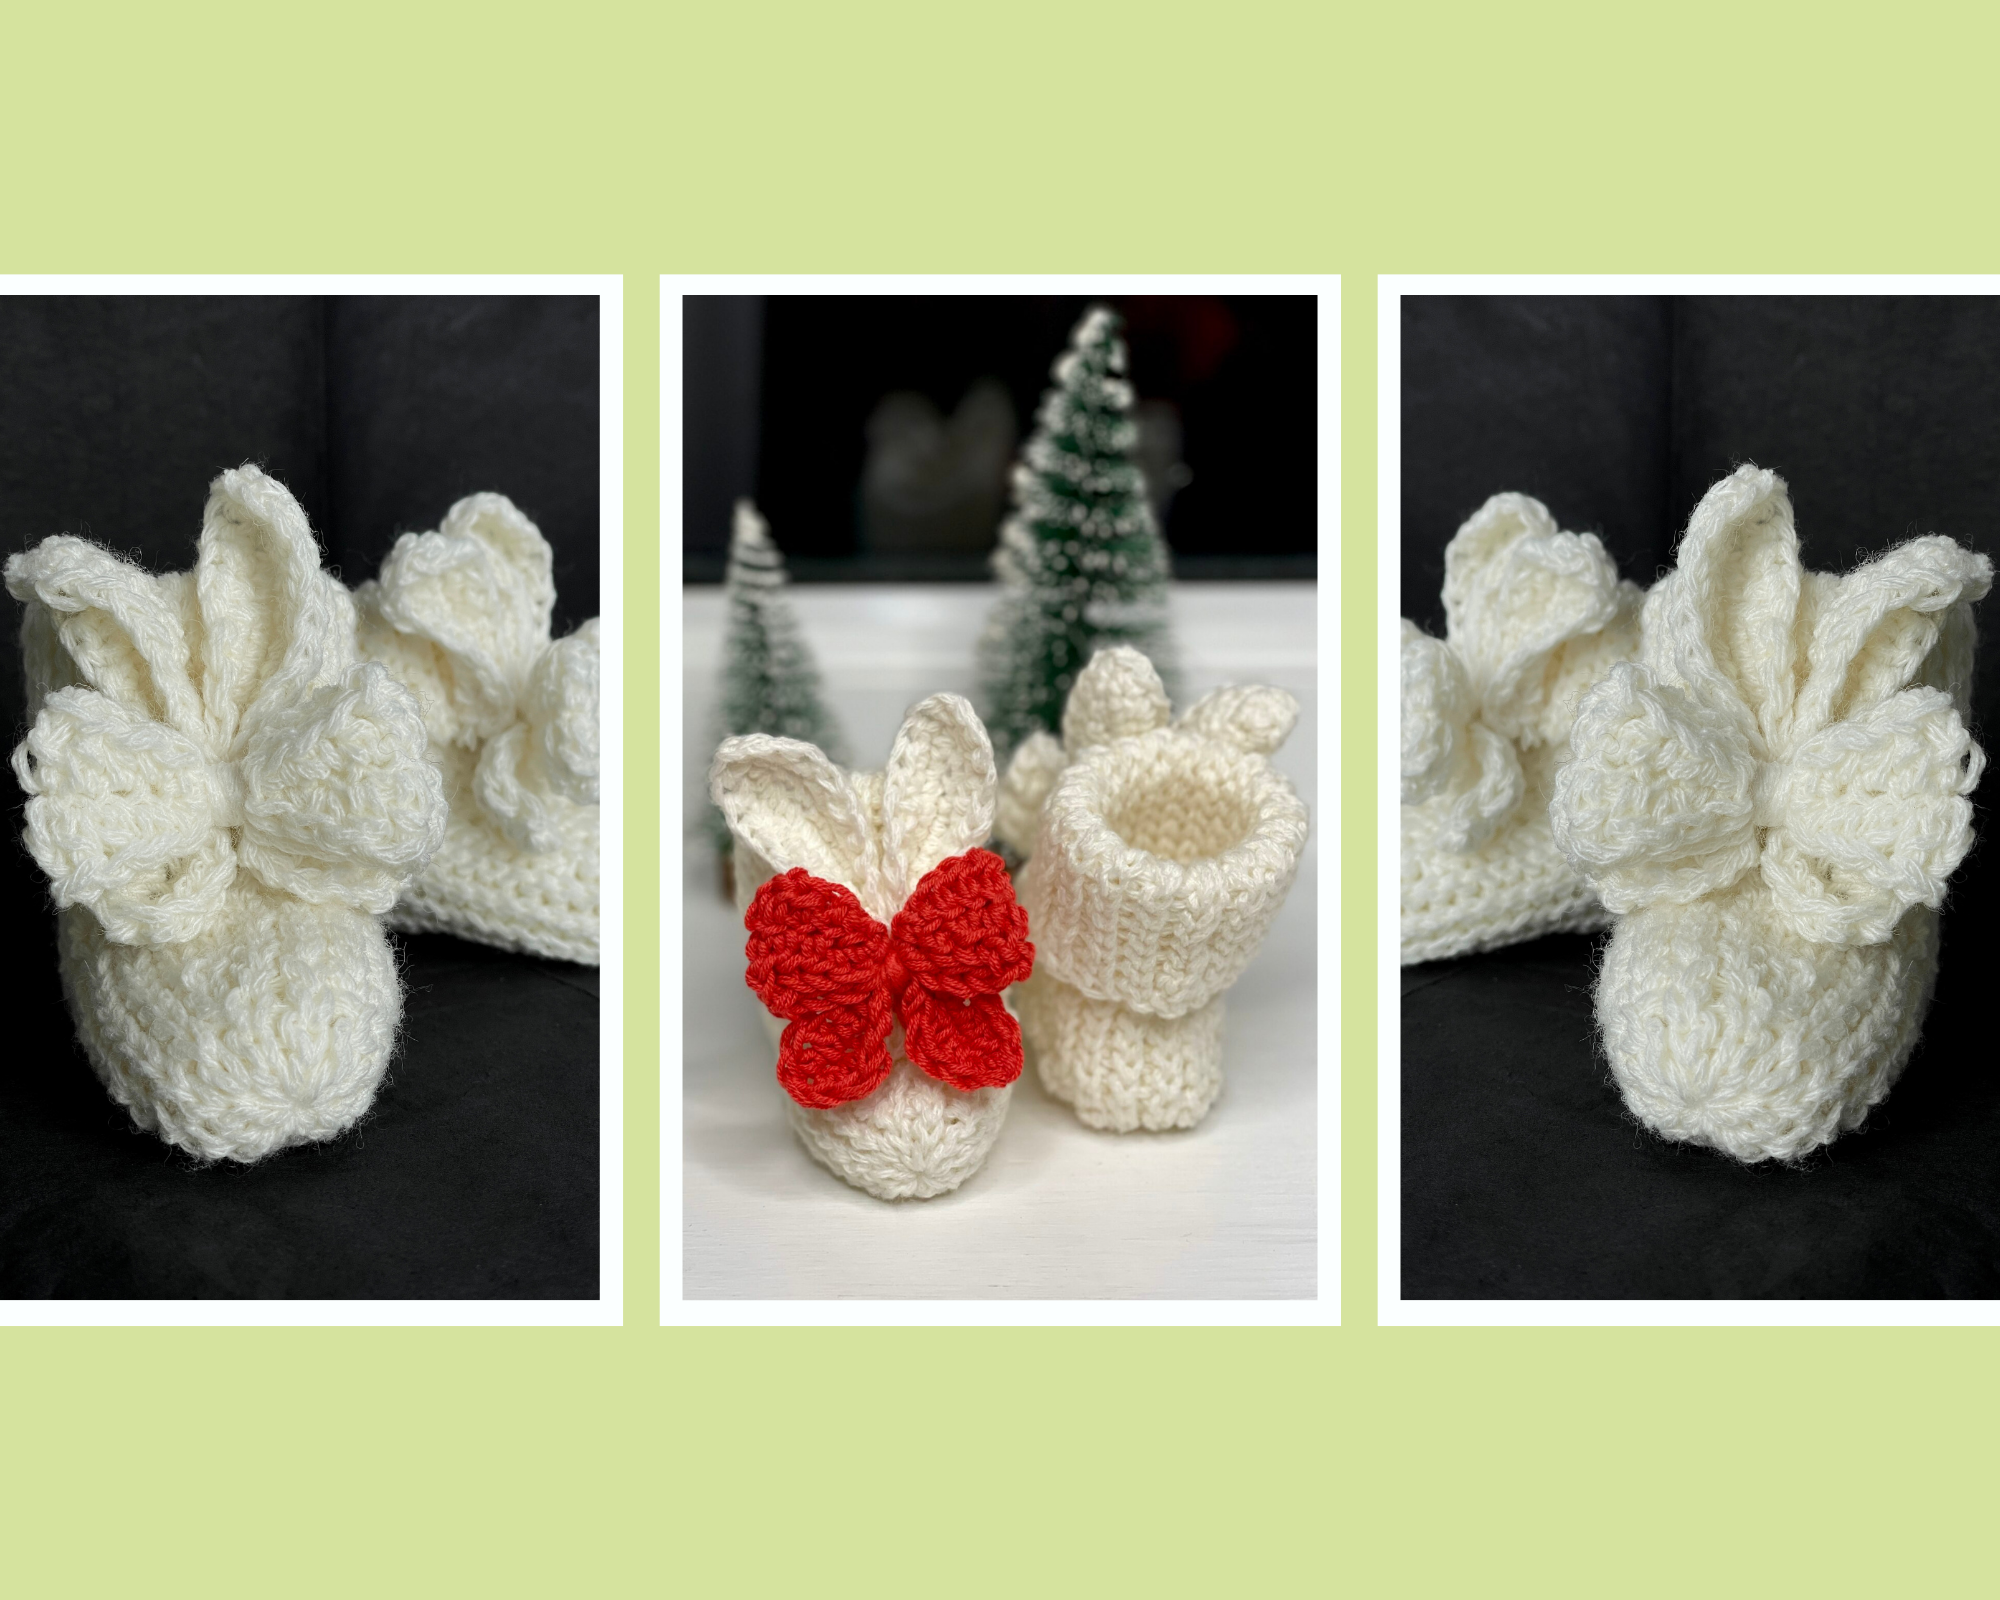
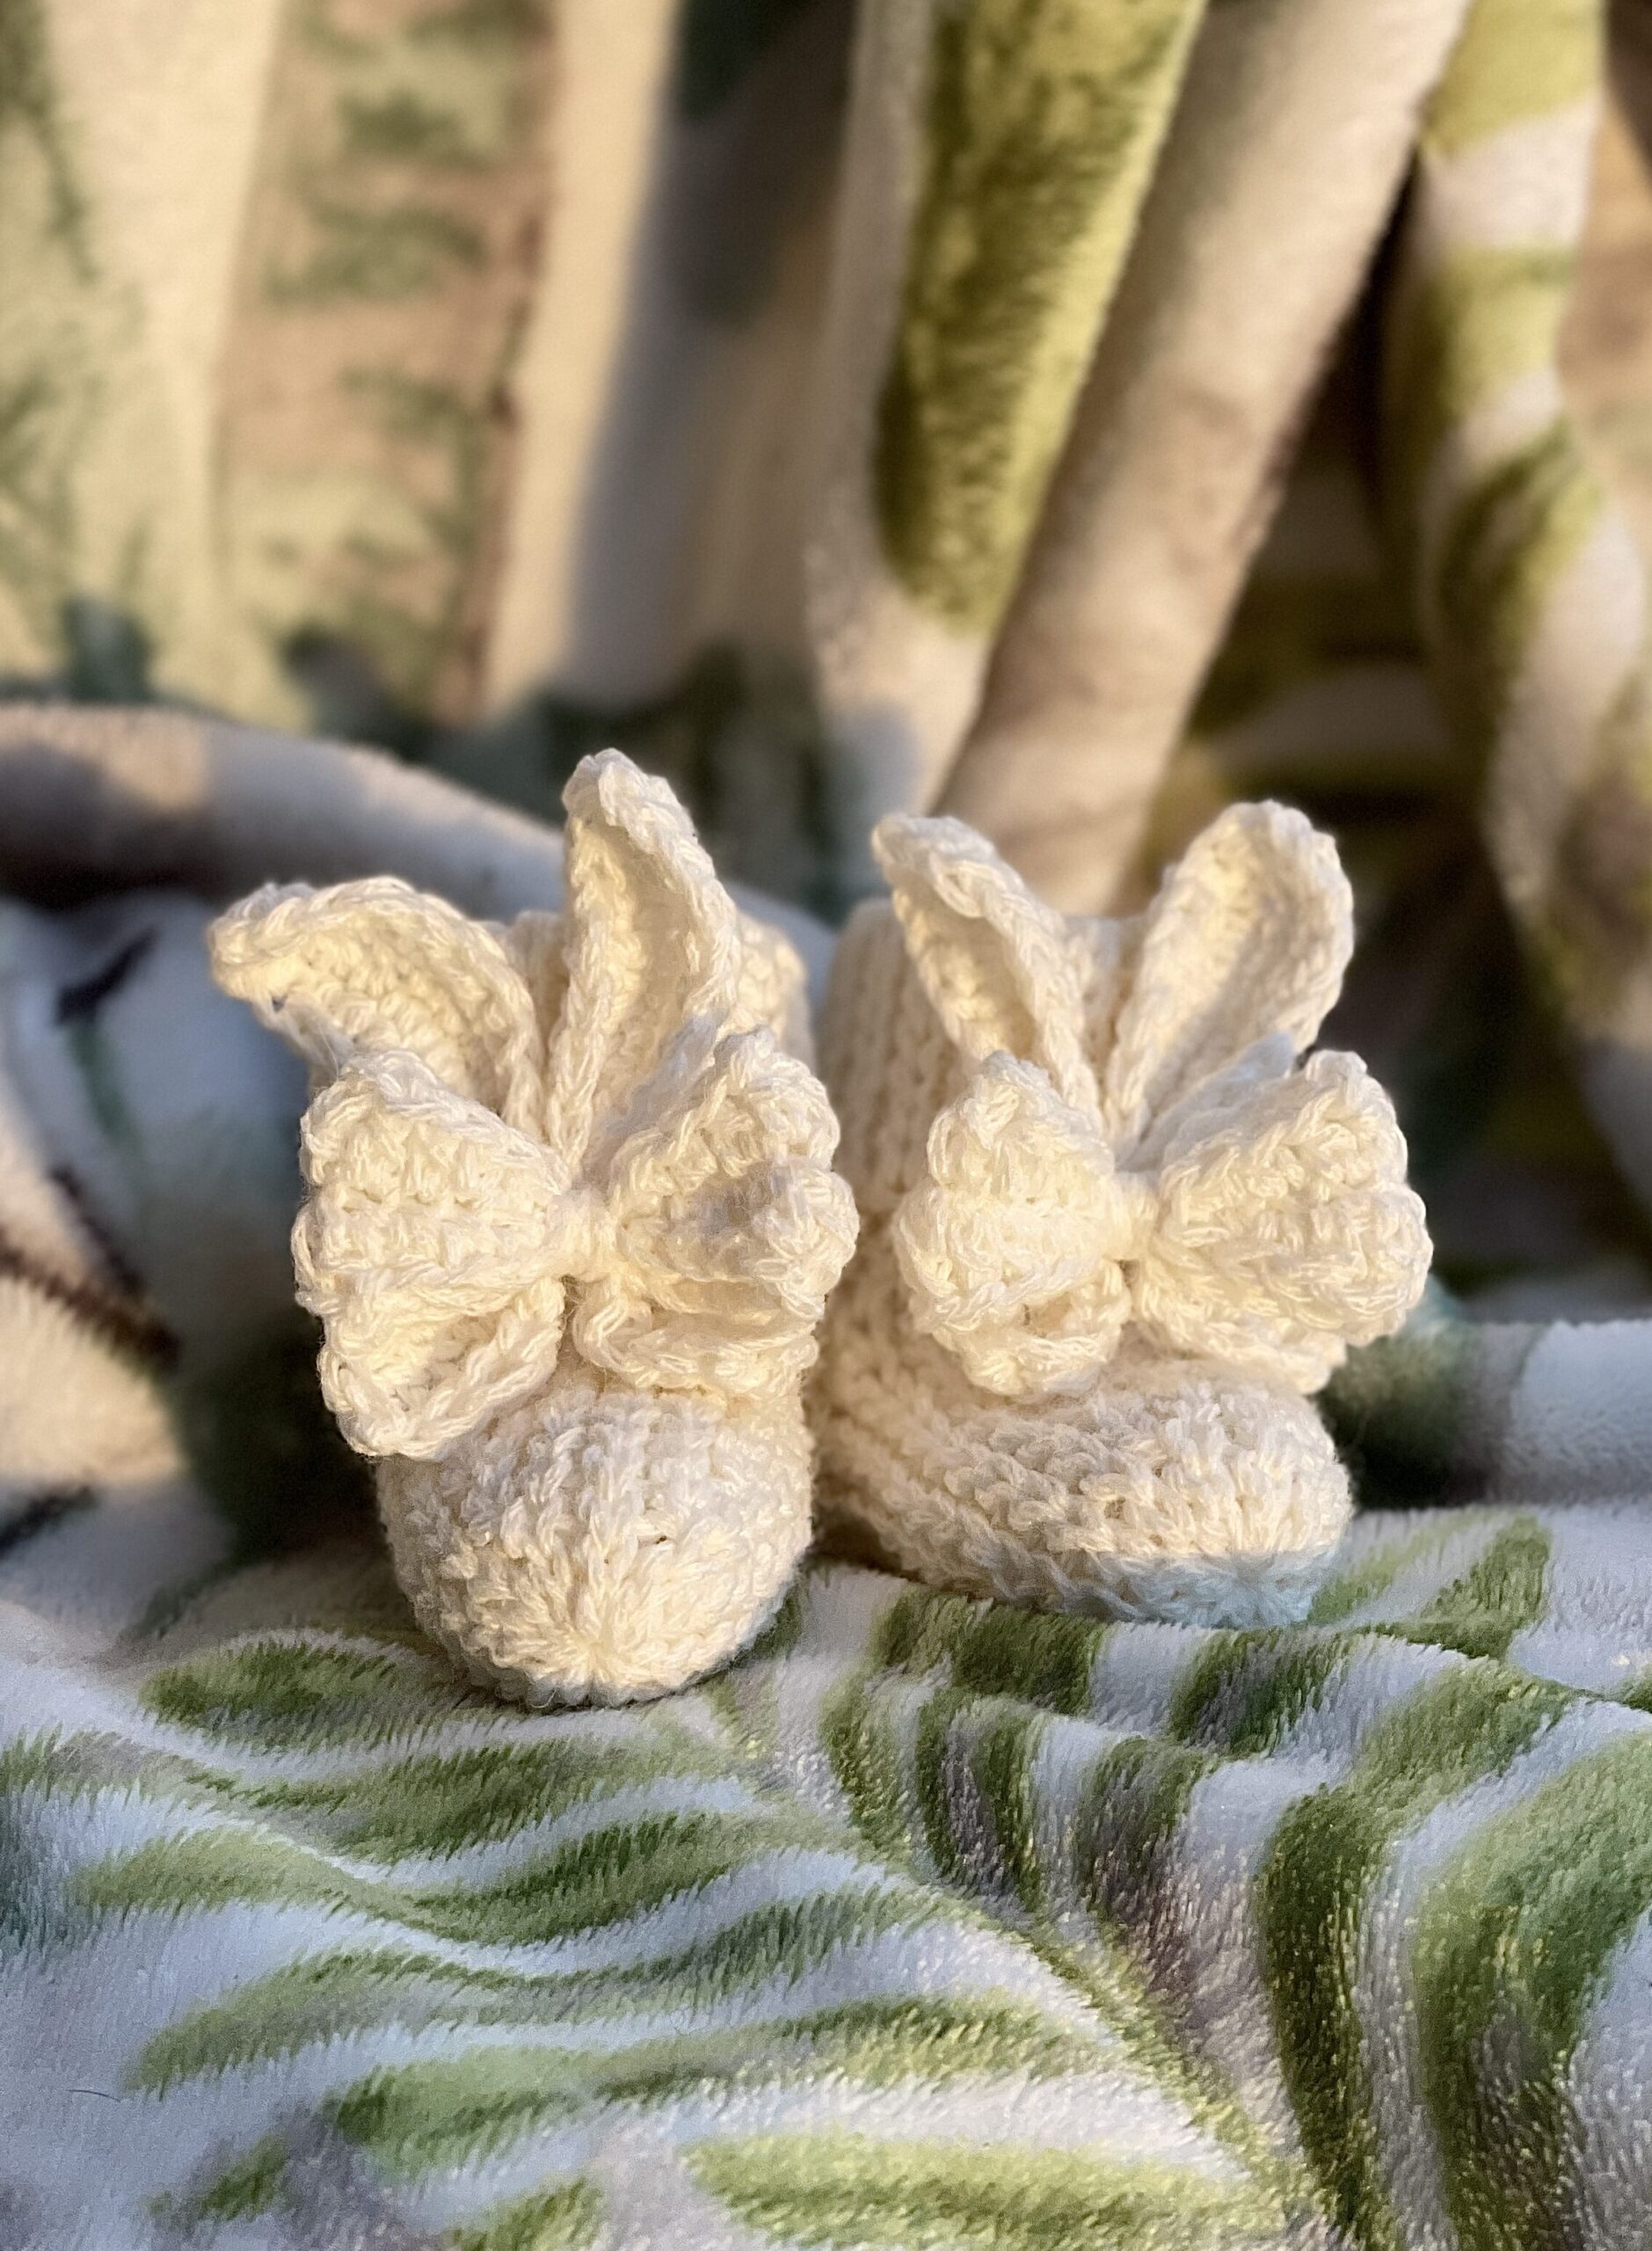
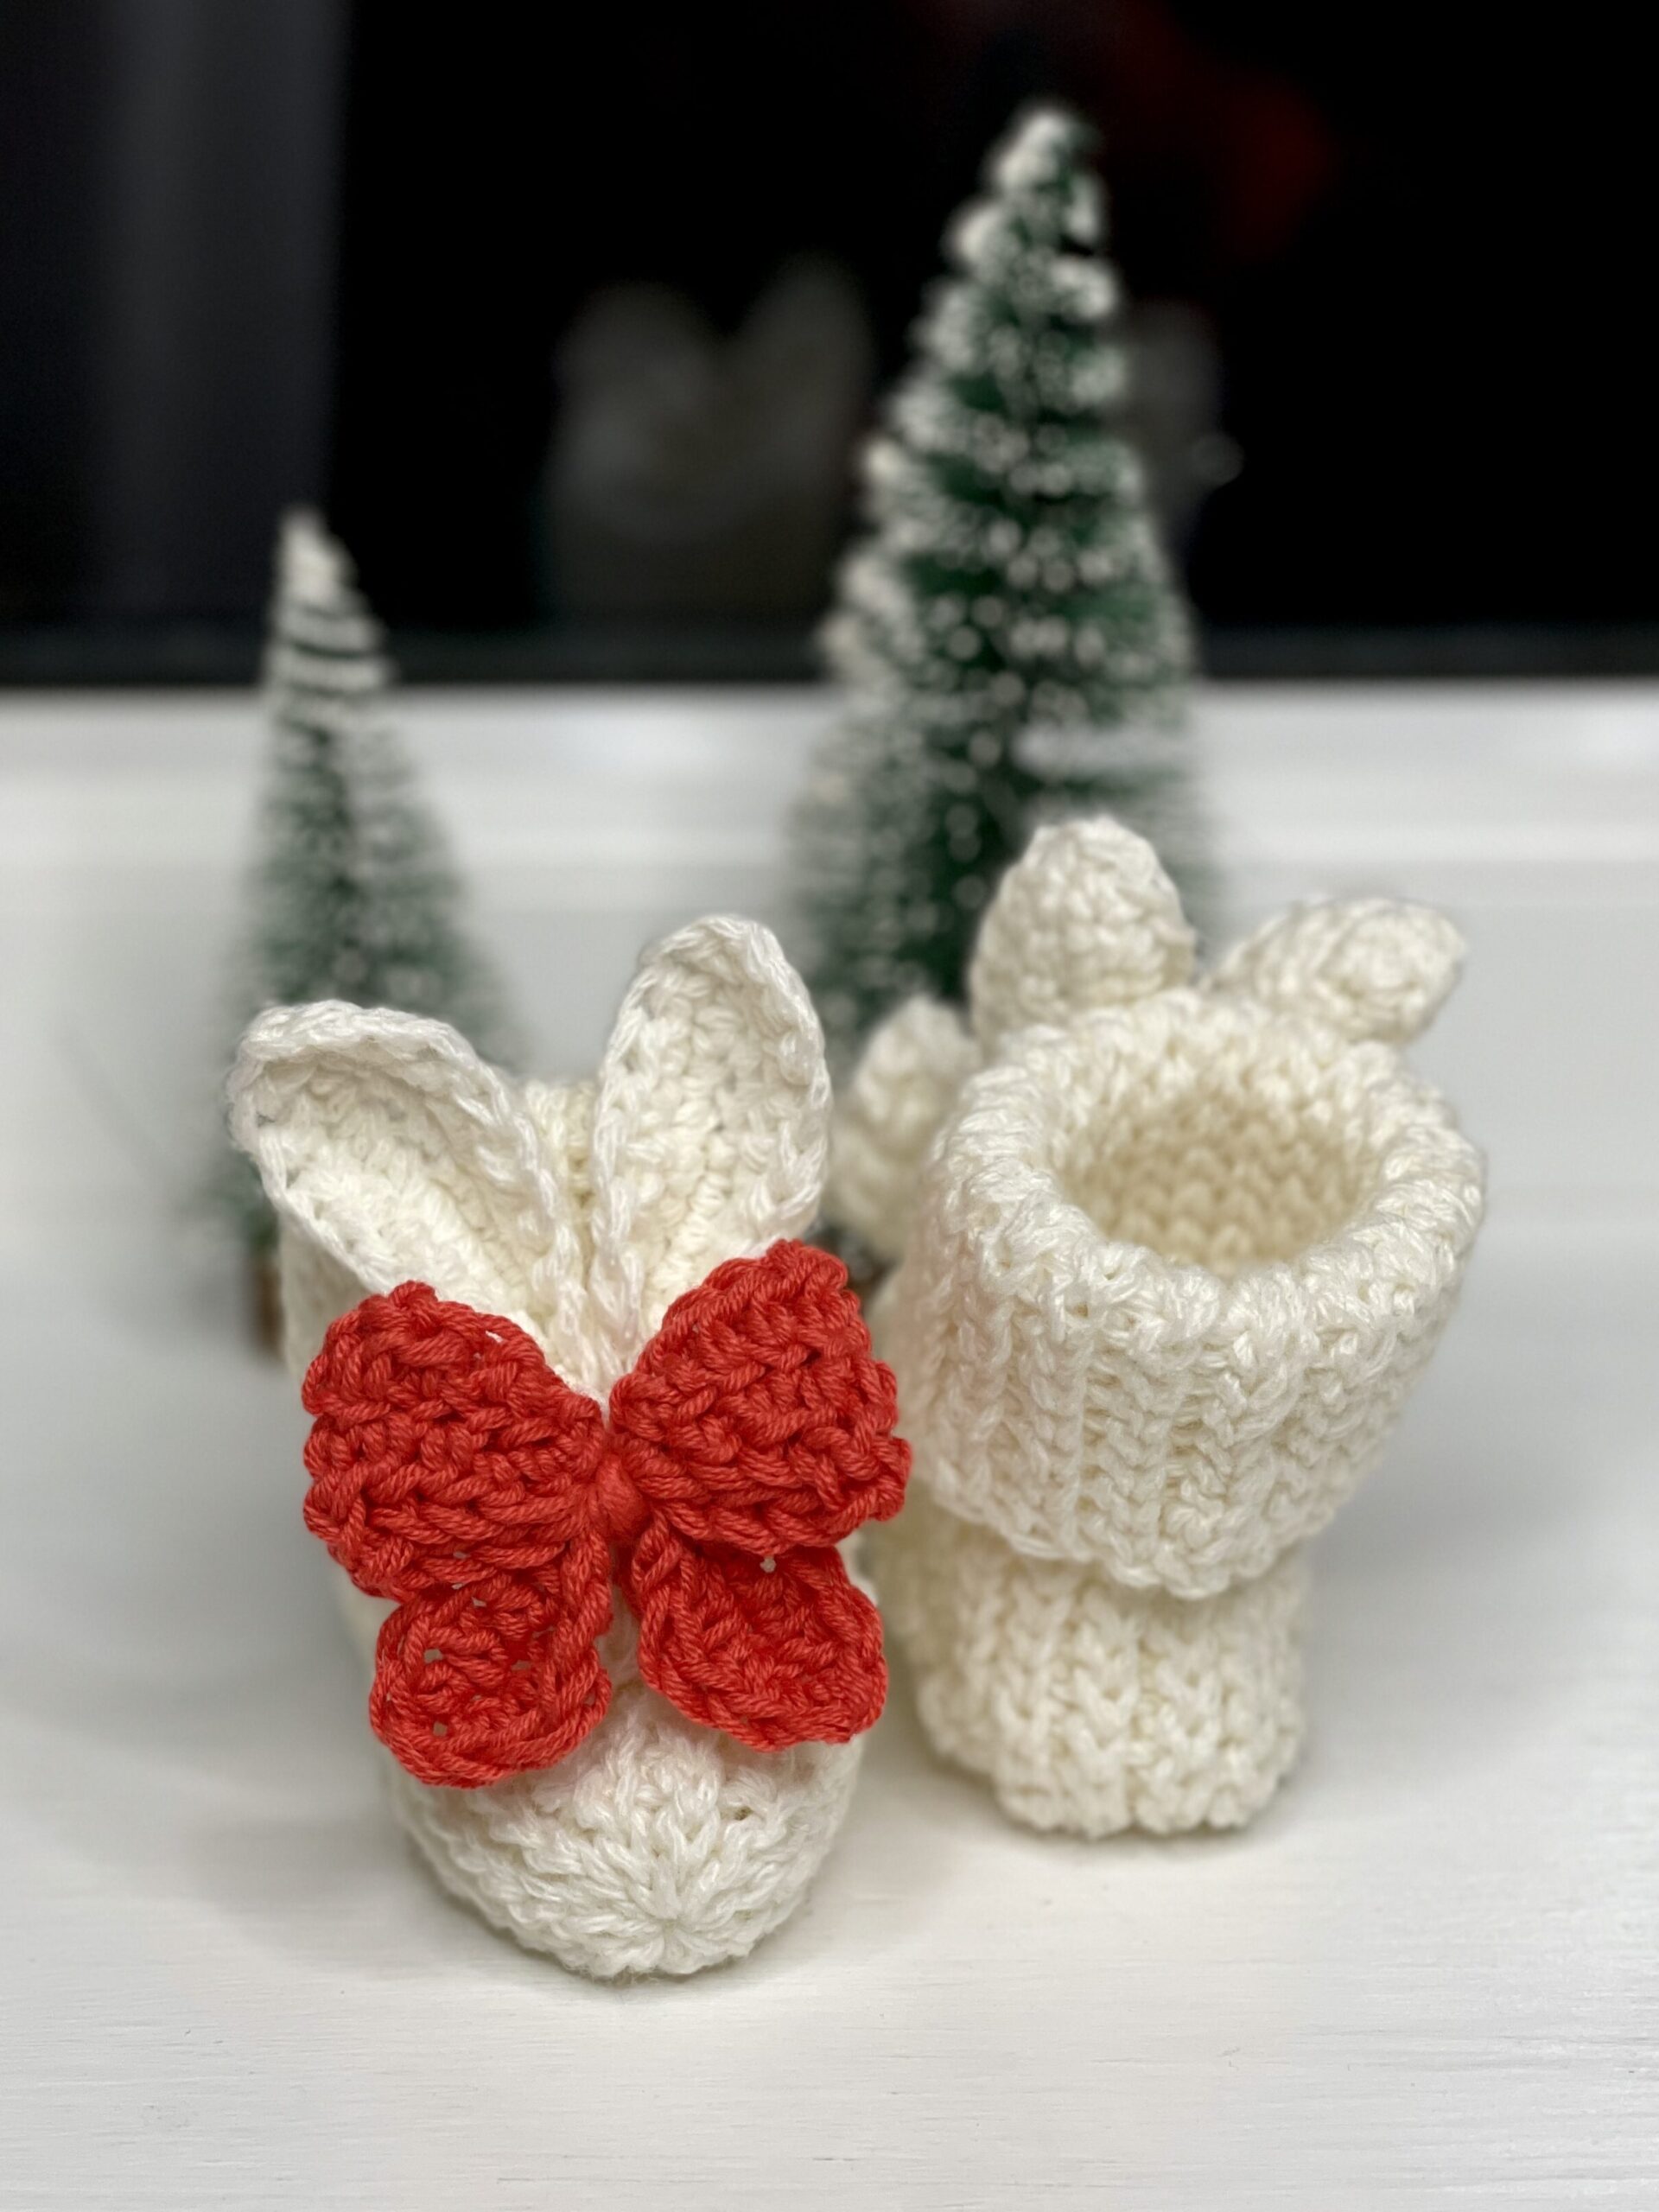
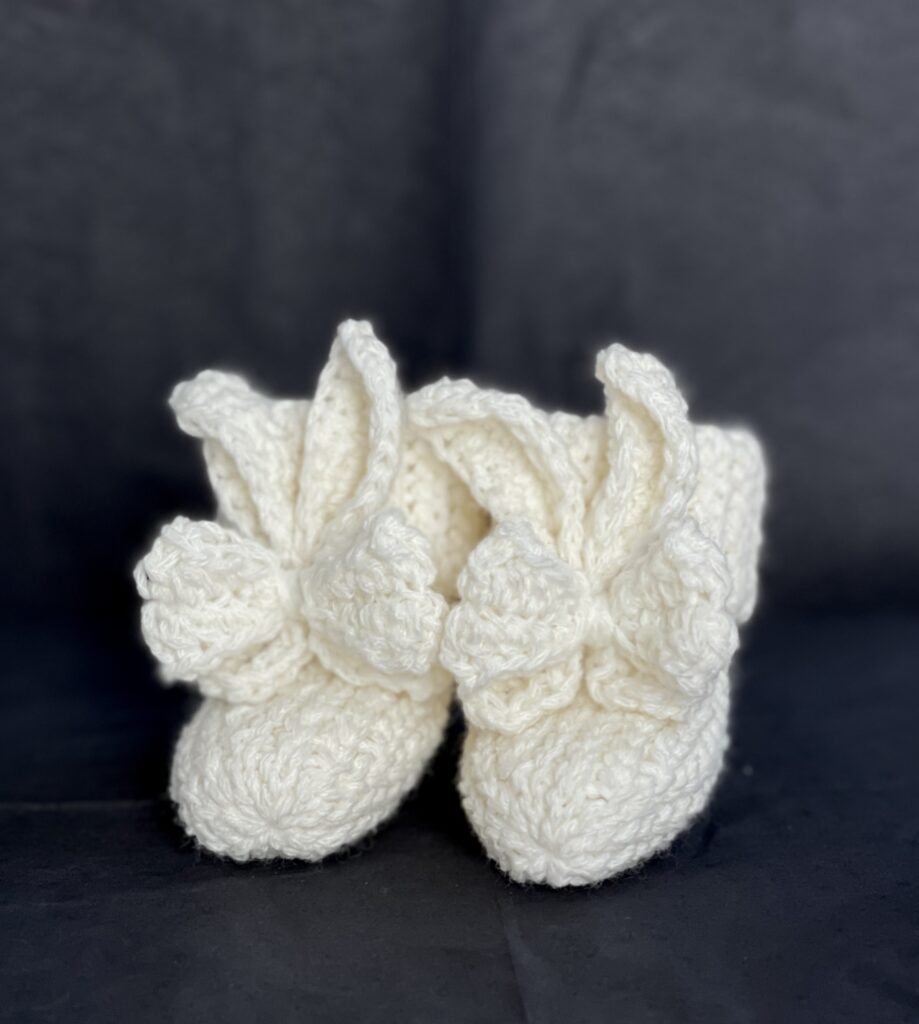
Crochet Baby Bunny Booties FREE pattern
Welcome to the free beginner-friendly Crochet Baby Bunny Booties pattern which helps beginners make adorable baby shoes. They’re a sweet gift idea or a lovely present for a crafty new mom. These socks keep little feet warm and look adorable. Even if you’re new to crochet, this pattern will be fun and rewarding. Let’s get started on making these charming little baby booties that’ll bring smiles to both the maker and the receiver!
If you try to make this, please tag me on Instagram @lerugi.crochets or leave a reply here, all feedback is greatly appreciated.


Materials:
Yarn 50 g (fingering yarn, super fine/fine, length ~191 yards/175 m, composition: with wool)
Hook 3 mm and 2 mm
Darning needle
Gauge:
22 sts x 17 rows = 10 cm
Worked over slip stitch in back loops only (slst blo).
Sizing:
| Month | Length (cm/inch) | Stitch count |
| 0-3 | 8/3.15 | 42 (+1 turning chain) |
| 3-6 | 10/4 | 46 (+1) |
| 6-12 | 12/4.7 | 50 (+1) |
Abbreviations:
fc – foundation chain
st – stitch
ch – chain
sl st – slip stitch
blo – back loop only
sc – single crochet
hdc – half double crochet
HOW TO CROCHET BABY BOOTIES (x2) (use 3 mm hook)
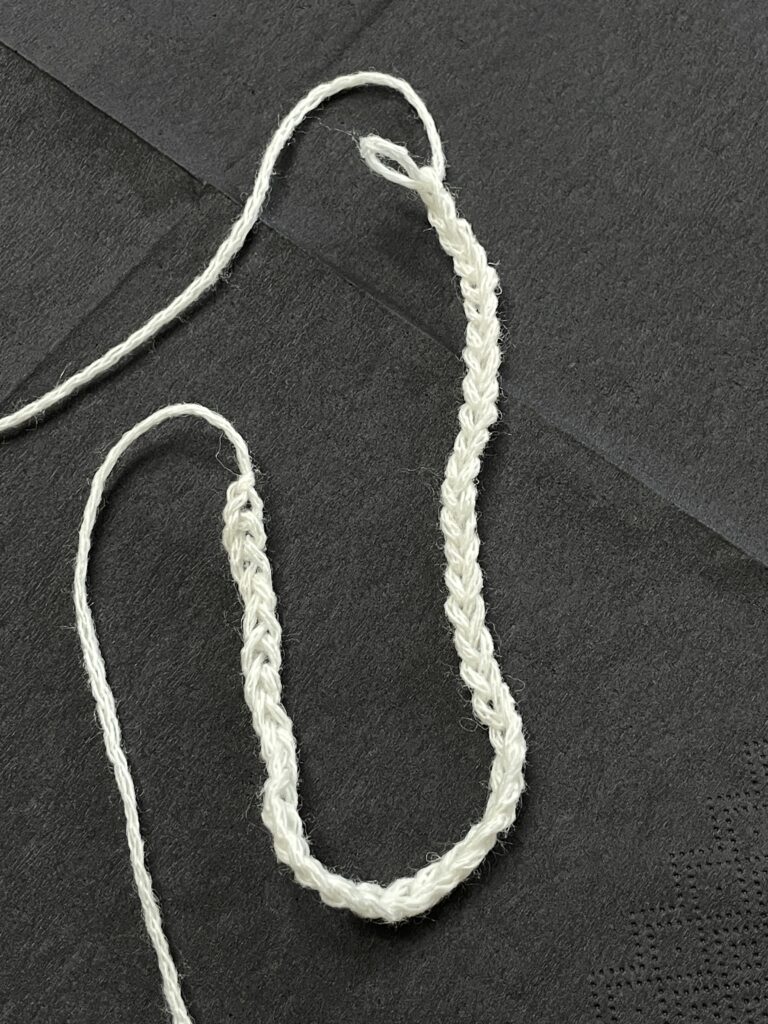
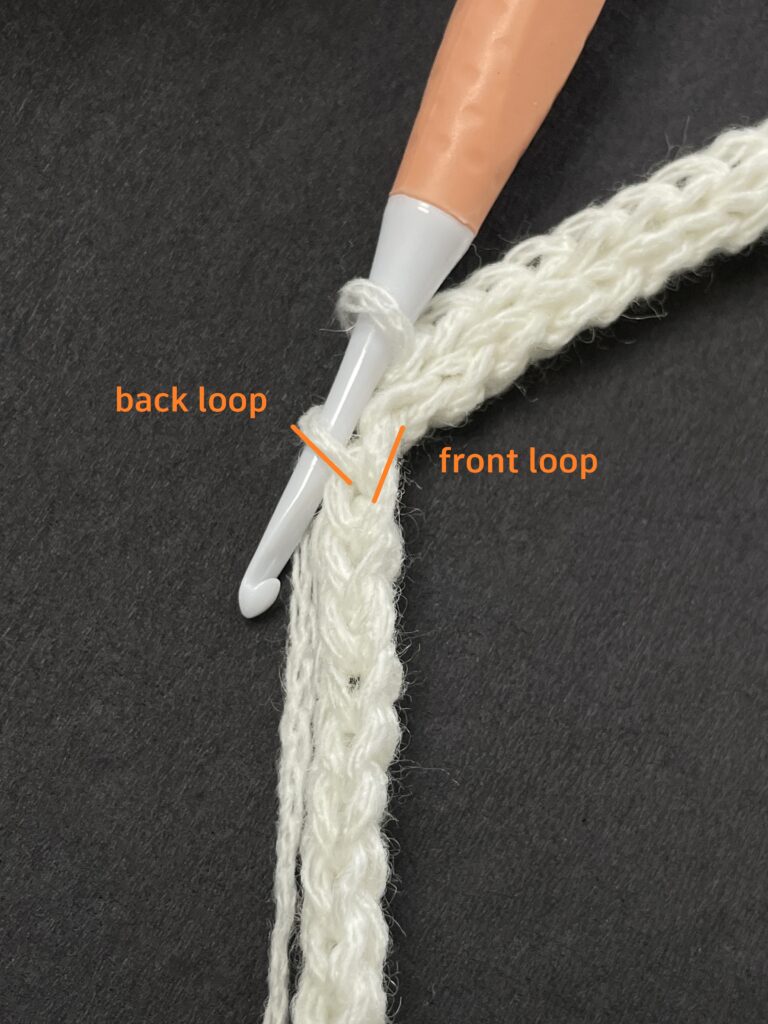
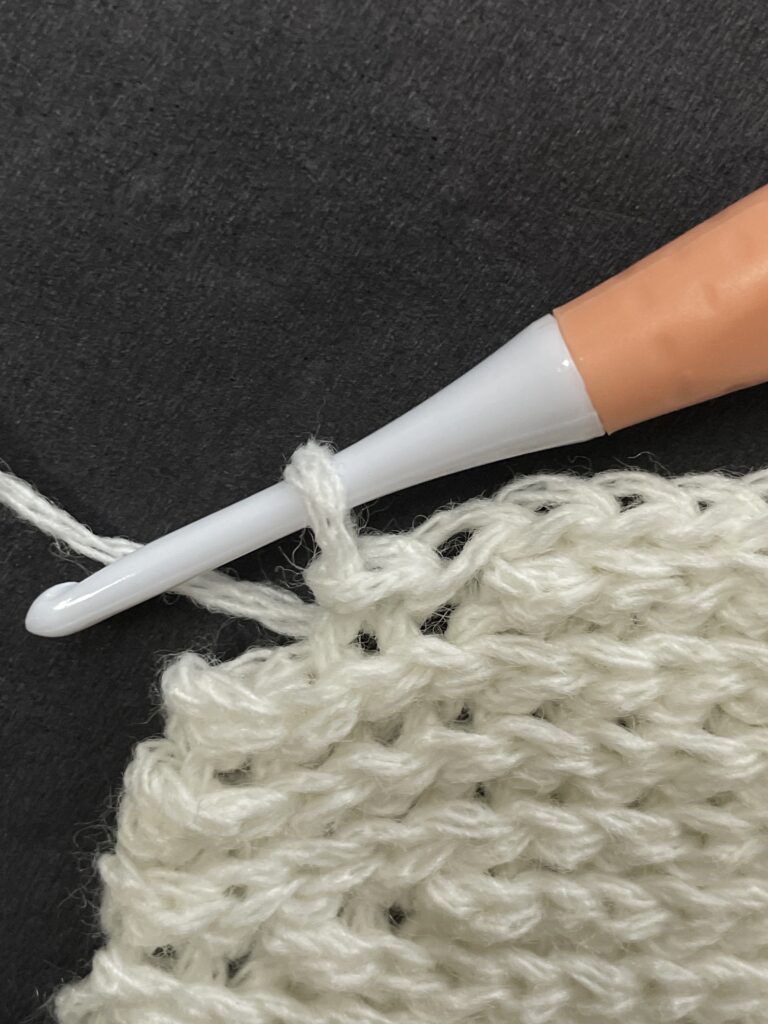
FC: chain (42/46/50) stitches to the needed size, chain +1 and turn. (picture 1)
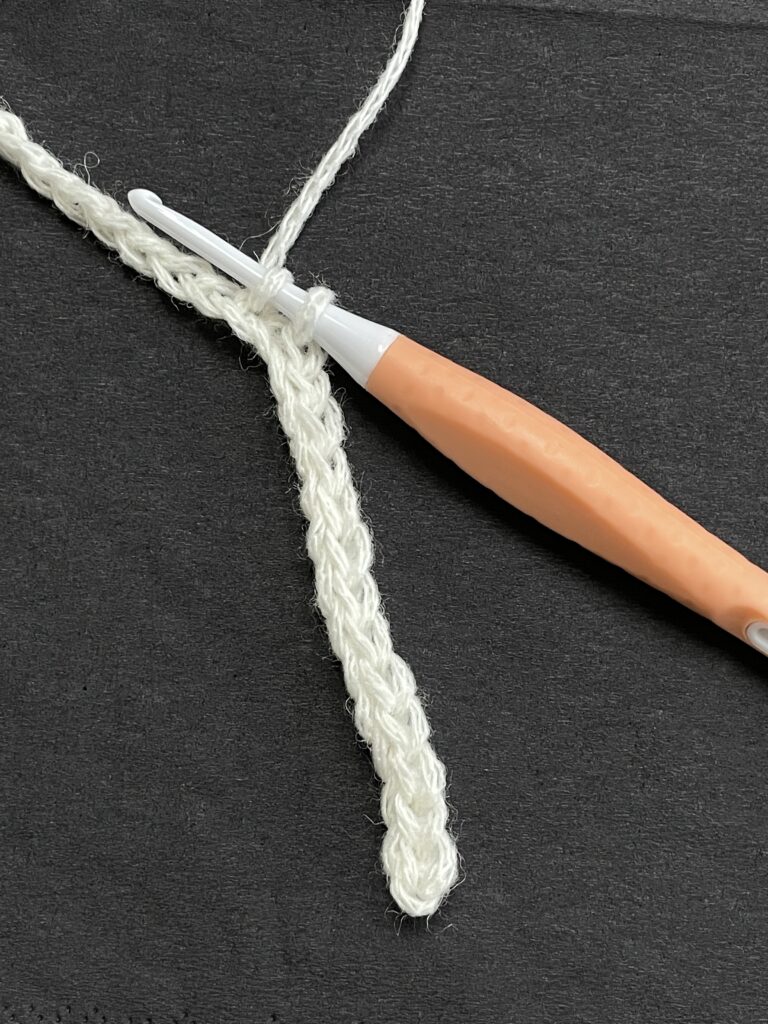
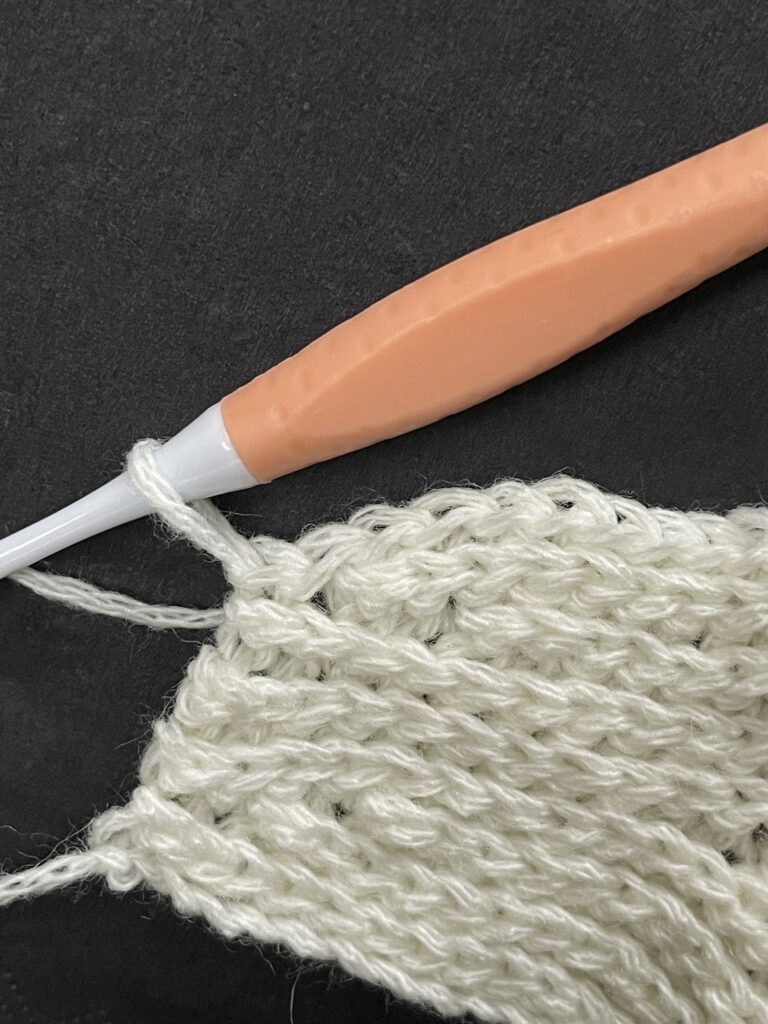
Row 1: skip the first st and make sl st (42/46/50) all the way to the end of the row. Ch1 and turn. (picture 2)
Row 2: sl st blo (from this point for all the project we make slip stitches in back loops only!) to the end of the row (42/46/50). Ch1 and turn. (picture 3)
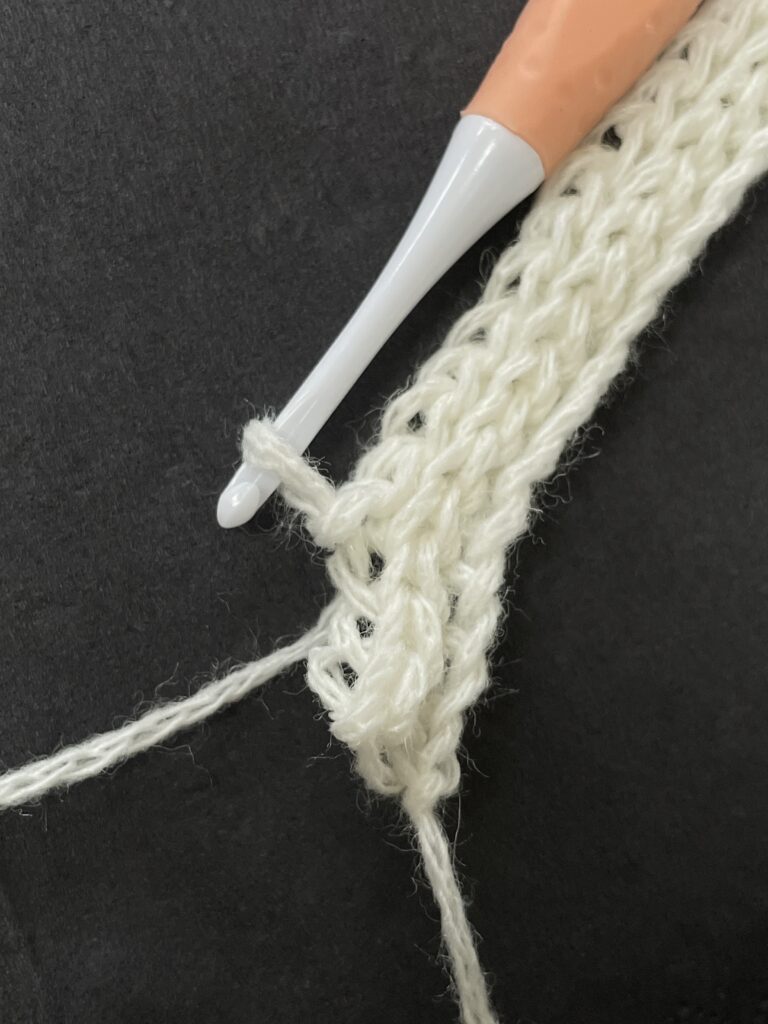
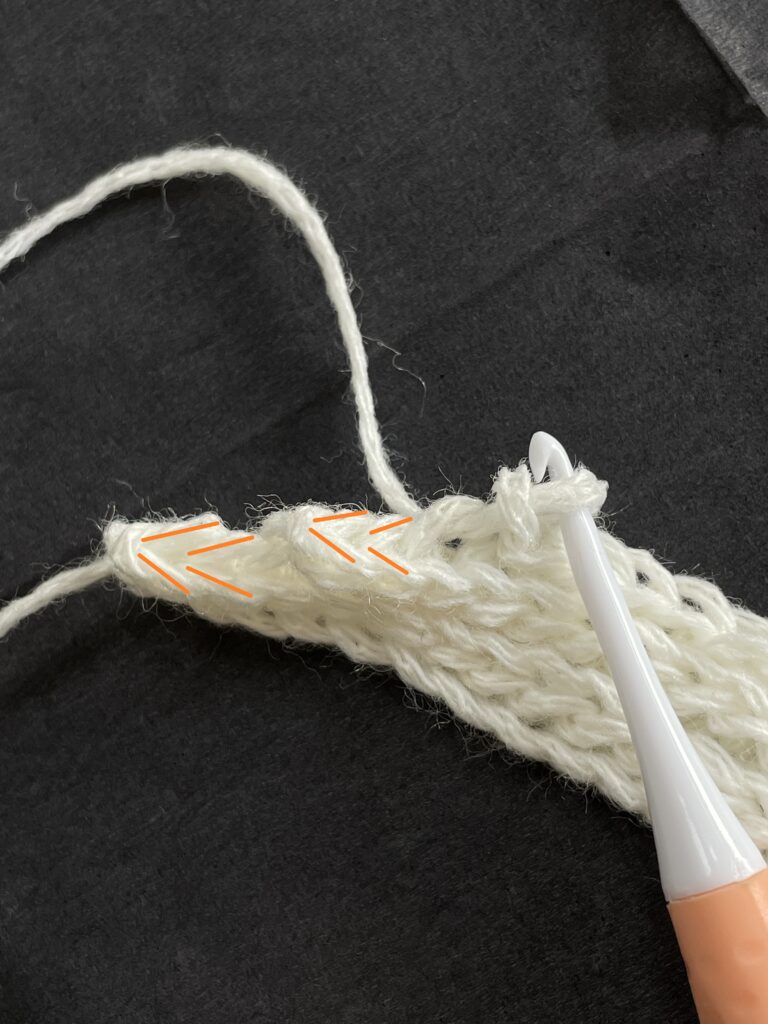
Row 3: sl st blo (40/44/48), leave 2 st at the end undone, ch1 and turn. (picture 4)
*for all sizes put marker on 25 st counting from the beginning.
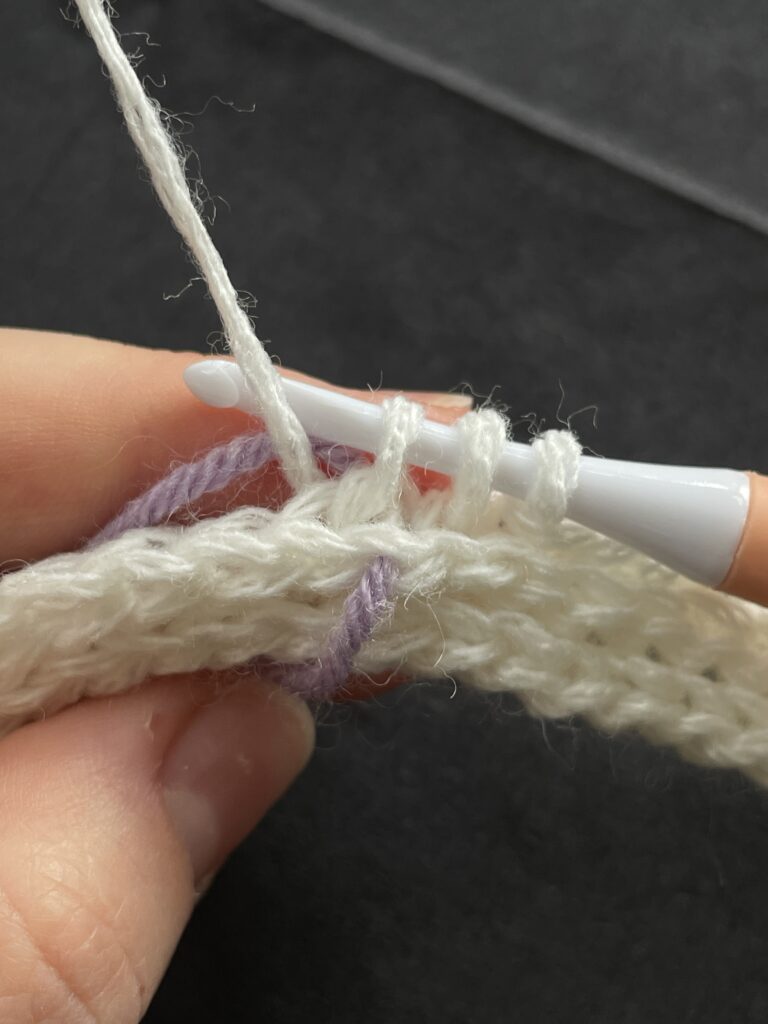
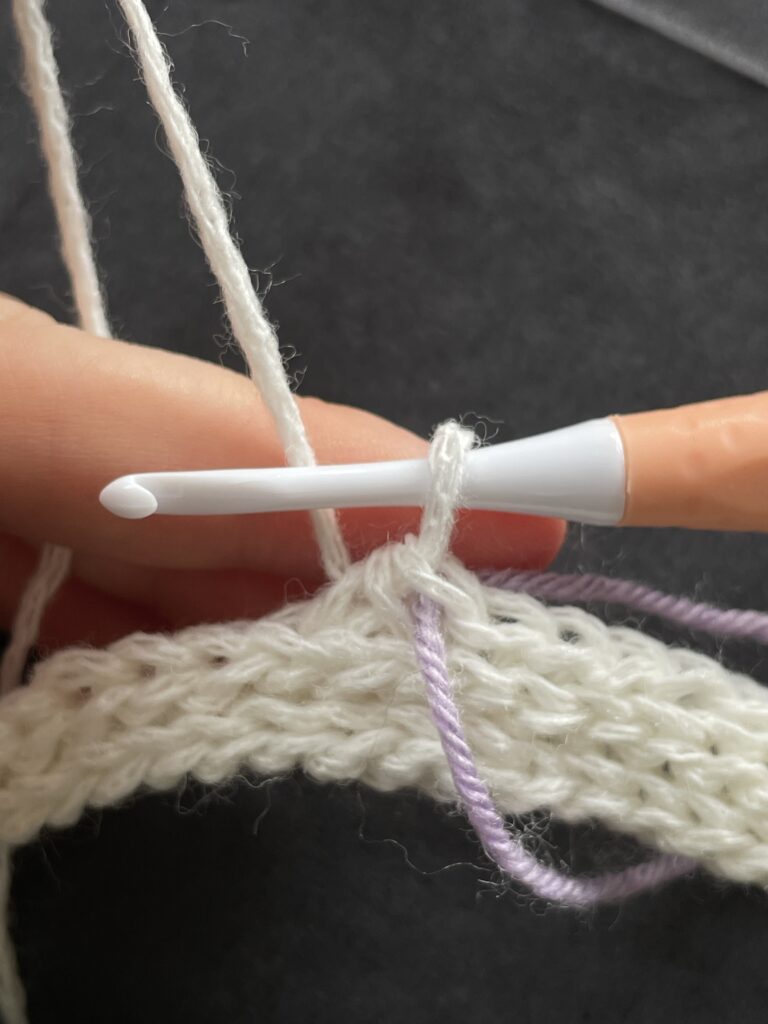
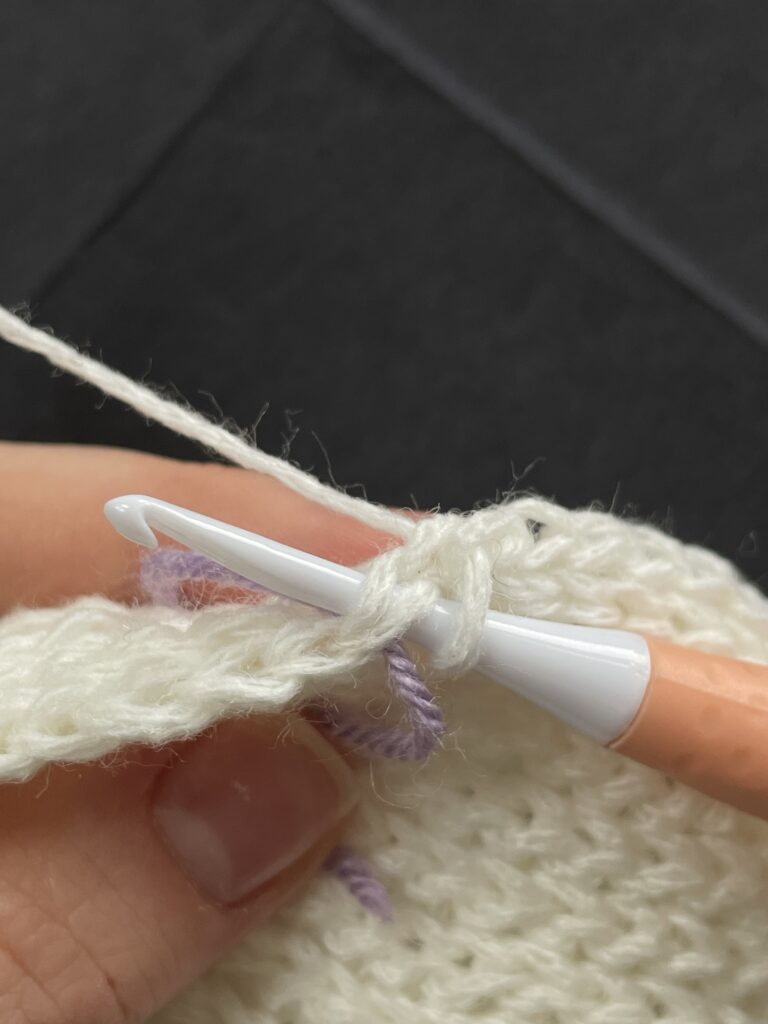
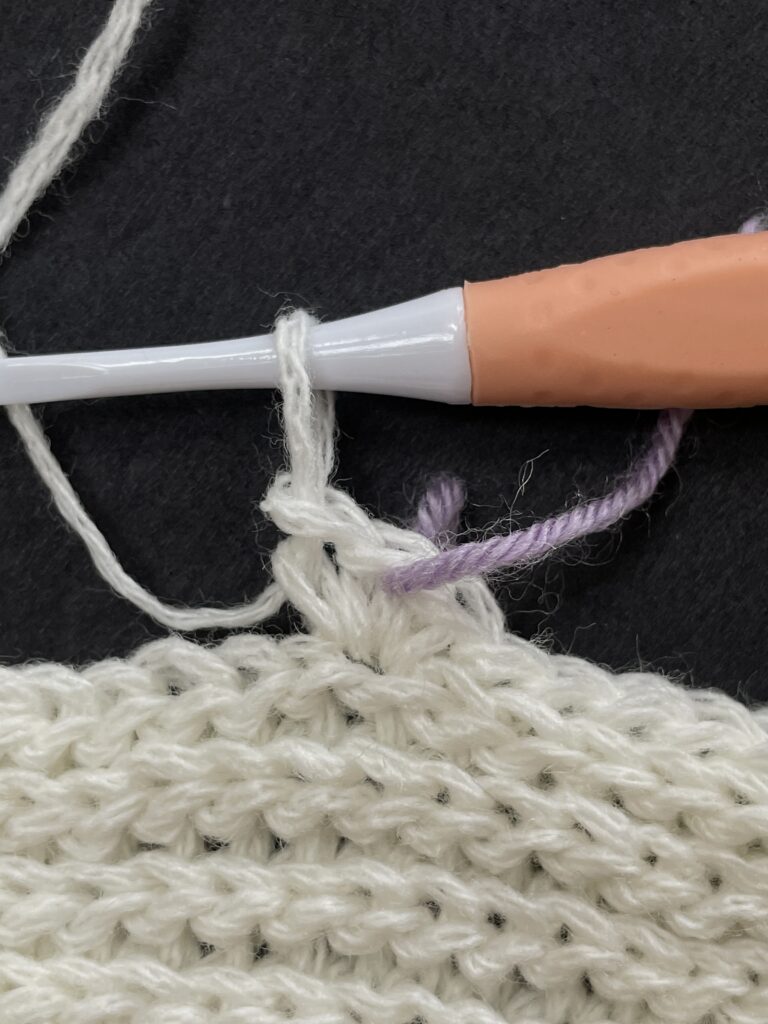
Row 4: sl st blo (14/18/22), make a decrease: pull a loop from the st before the marker (picture 5), insert a hook in the st where the marker was placed, and insert a hook in the next st as well. (picture 6) Yarn over and pull through 2 loops (there should be 3 more loops on the hook), yarn over and pull through all 3 loops. (picture 7) Insert a marker (where you just made a decrease, there should be visible 3 joined stitches). Finish slst blo until the end of the row. Ch 1, turn (picture 8)


Row 5: sl st 22, make a decrease (as written above), sl st (11/15/19), leave 2 st at the end undone, ch1 and turn. (picture 9)
Row 6: sl st (10/14/18), decrease, finish the row with 21 sl st. Ch1 and turn.
Row 7: sl st 20, decrease, and finish until the very end joining previous rows together like normal (13/17/21). Ch 1, turn. (picture 10, 11)

Row 8: sl st (12/16/20), decrease, 19 sl st until the end. Ch1, turn.
Row 9: sl st 18, decrease, finish the row (11/15/19). Ch1, turn.
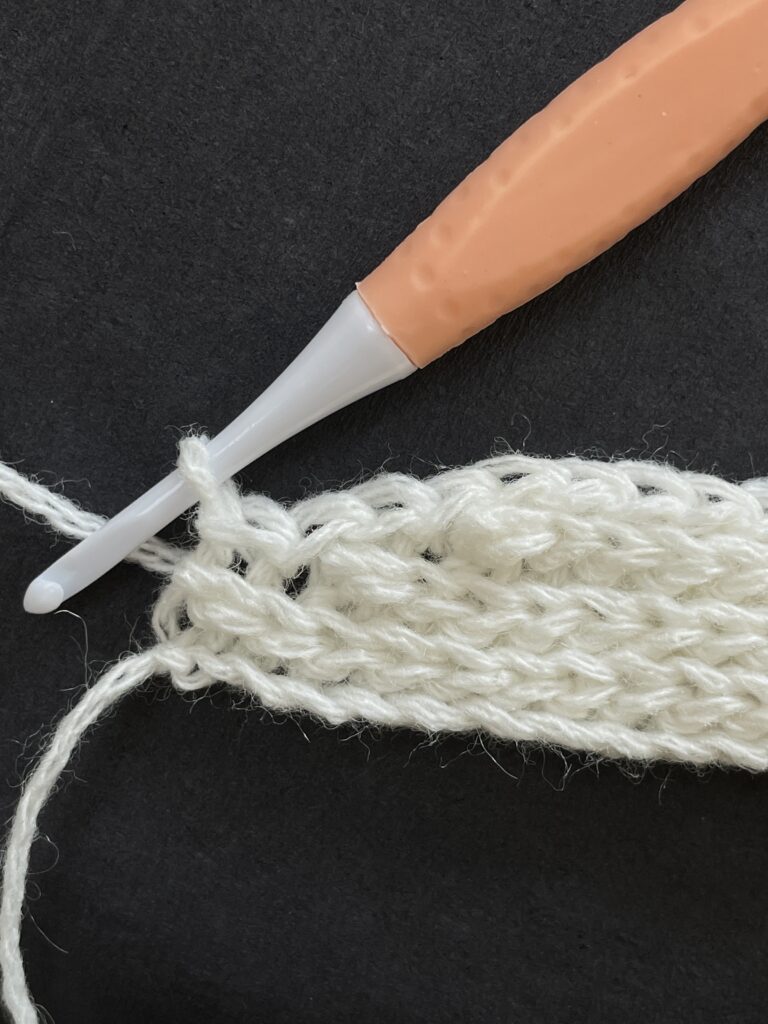
Row 10: sl st (30/34/38) until the end of the row. Replace the marker on top of the new row in same st (continue moving the marker up every row from this point!). Ch1, turn. (picture 12, 13)

Row 11-12: sl st (30/34/38), ch1, turn.
Row 13: sl st (26/30/34), leave 4 st undone at the end. Ch1, turn. (picture 14)
Row 14: sl st (26/30/34), ch1, turn.
Row 15: sl st (28/32/36), at the end join 2 st from the row below. Ch1, turn. (picture 15)
Row 16: sl st (28/32/36), ch1 and turn.
Row 17: sl st (30/34/38), at the end join 2 st from the row below. Ch1, turn. (picture 16)
Row 18-20: sl st (30/34/38). Ch1, turn.
Row 21: sl st (28/32/36), leave 2 st undone at the end. Ch1, turn.
Row 22: sl st (28/32/36), ch1, turn.
Row 23: sl st (26/30/34), leave 2 st undone at the end. Ch1, turn.
Row 24: sl st (26/30/34). Ch1, turn.
Row 25: sl st (30/34/38), join the last 4 st from previous rows. Ch1, turn.
Row 26-27: sl st (30/34/38). Ch1, turn.
Row 28: sl st (11/15/19), make an increase in the stitch where the marker was placed (picture 17): do 3 sc (through both loops of the stitch) in the same stitch. Place the marker again in the middle of these stitches (2nd sc). Continue with slst blo. Ch1, turn. (picture 18)
Row 29: sl st 19, increase, sl st 12/16/20. Ch1, turn.
Row 30: sl st 13/17/21, increase, sl st 20. Ch1, turn.
Row 31: sl st 21, increase, sl st 10/14/18, leave 4 st undone at the end. Ch1, turn.
Row 32: sl st 11/15/19, increase, sl st 22. Ch1, turn.
Row 33: sl st 23, increase, sl st 14/18/22, join last 2 st from the previous row. Ch1, turn.
Row 34: sl st 40/44/48, ch1, turn.
Row 35: sl st 42/46/50, join last 2 stitches from the previous row, ch1.
HOW TO CONNECT BOOTIES
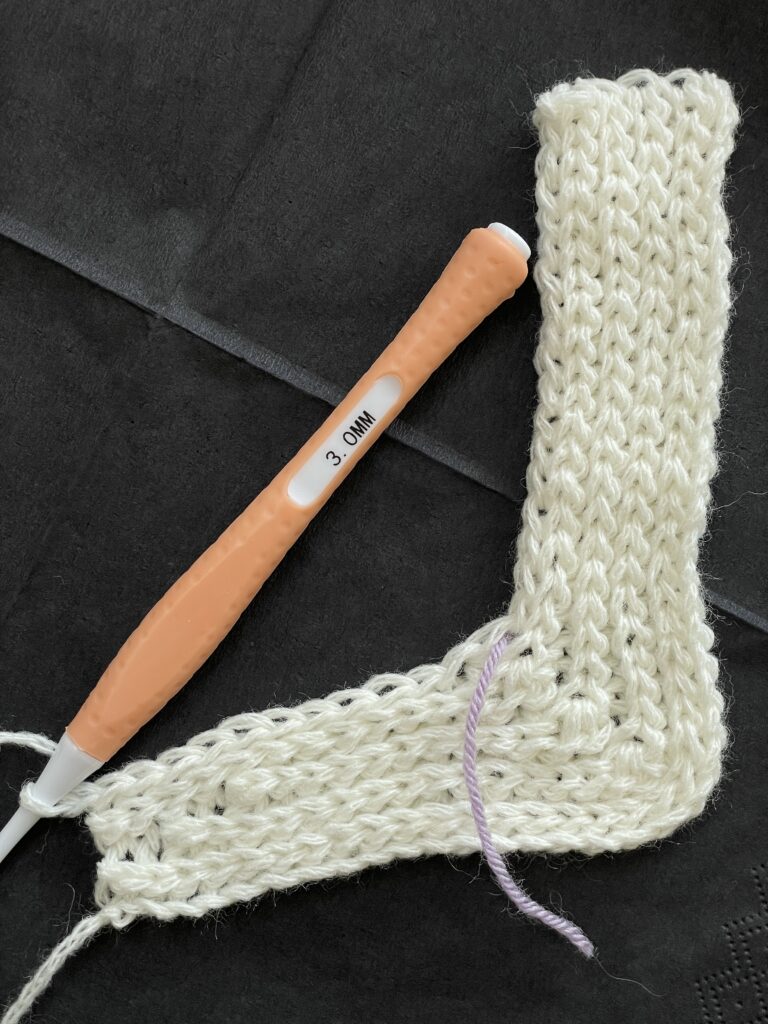
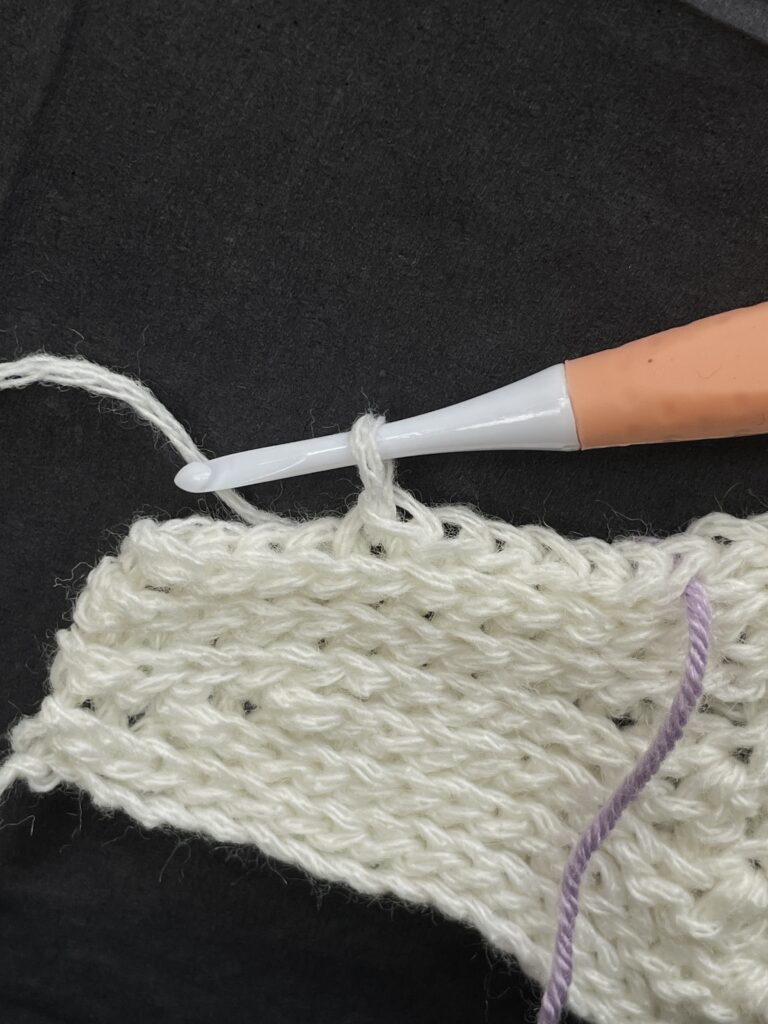
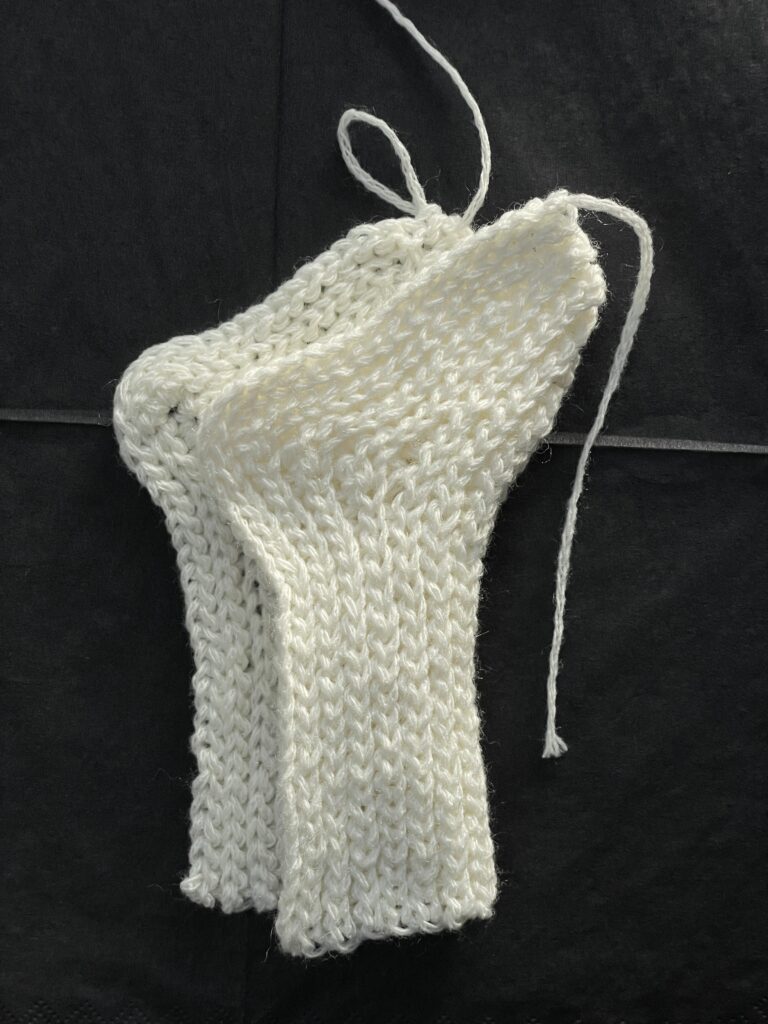
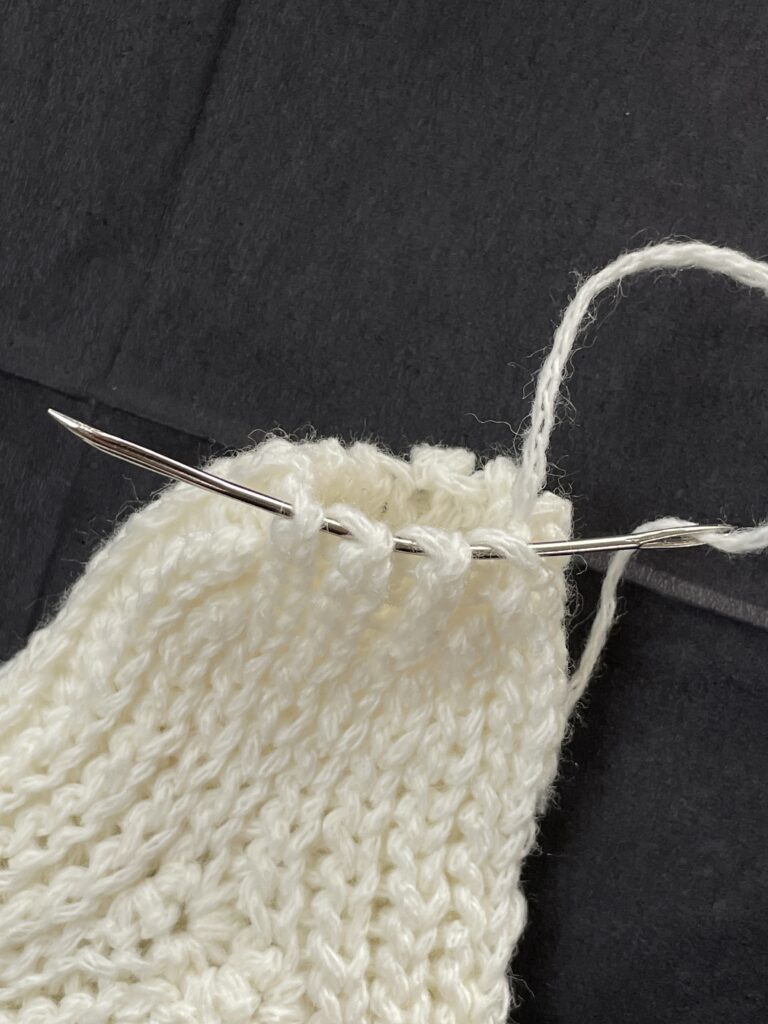
- Fold the project in half and join each stitch with sl st back loops only. (picture 19, 20)
- To close the finger part use a darning needle. Go in between the loops all around the open end and pull it tight to close, make some knots, and weave the yarn ends. (picture 21)

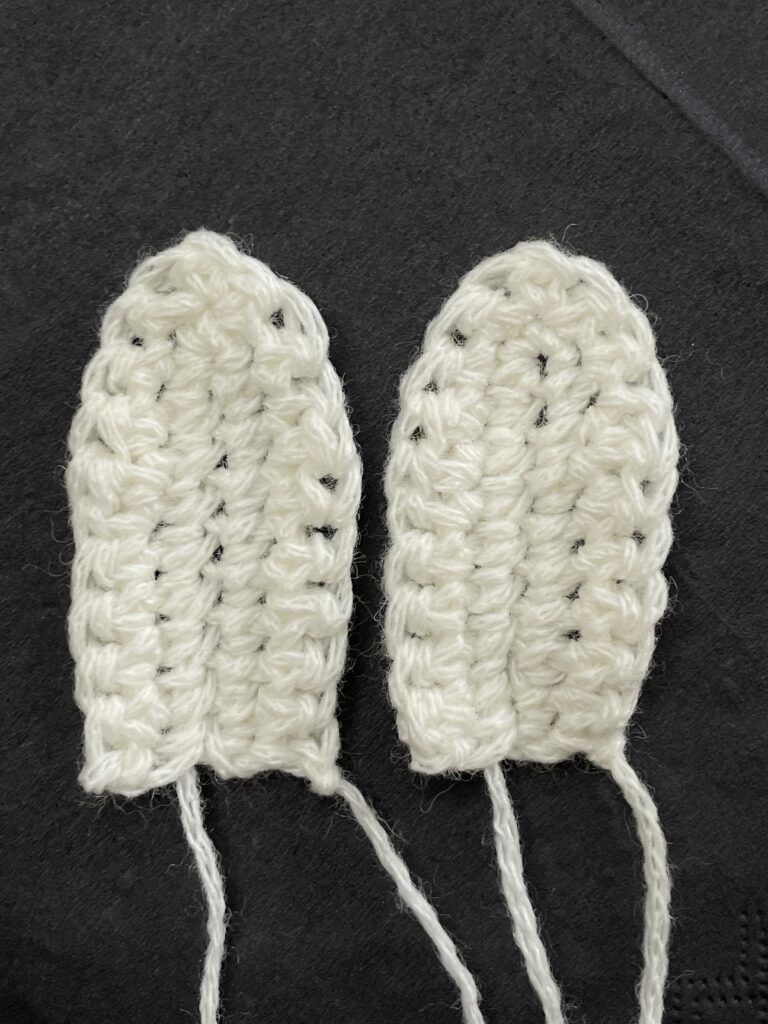
HOW TO CROCHET BUNNY EARS (x2) (use 2mm hook)
FC: 10 ch.
Row 1 (around fc): skip first ch, 8sc, place 3sc in the last st, and continue placing 1sc in each st above the 8 sc just made. Ch1, turn. (picture 22)
Row 2: 5sc, 2 hdc, 2sc, in the same stitch (1sc, ch1, 1sc), 2sc, 2hdc, 5sc. Ch1. (picture 23)

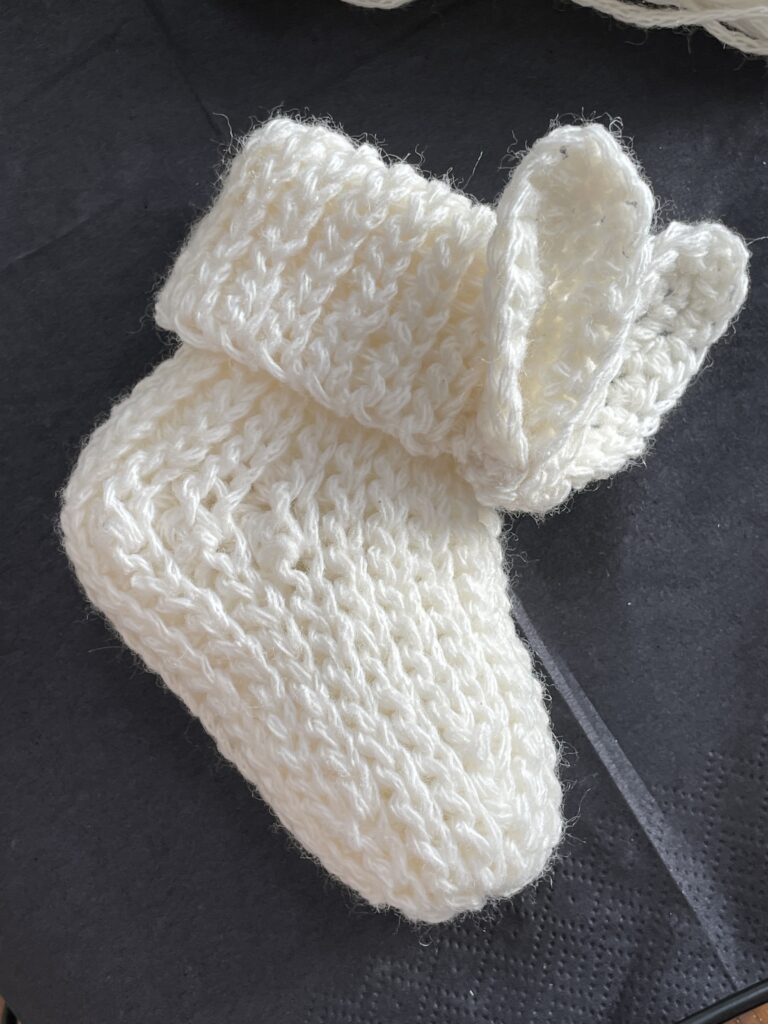
HOW TO ATTACH THE EARS
- Sew both ears at the bottom (connect just 2 first stitches) together; (picture 24)
- Place the connected ears on the edge of the booty cuff and sew it together. You can also attach the upper ear part. (picture 25)


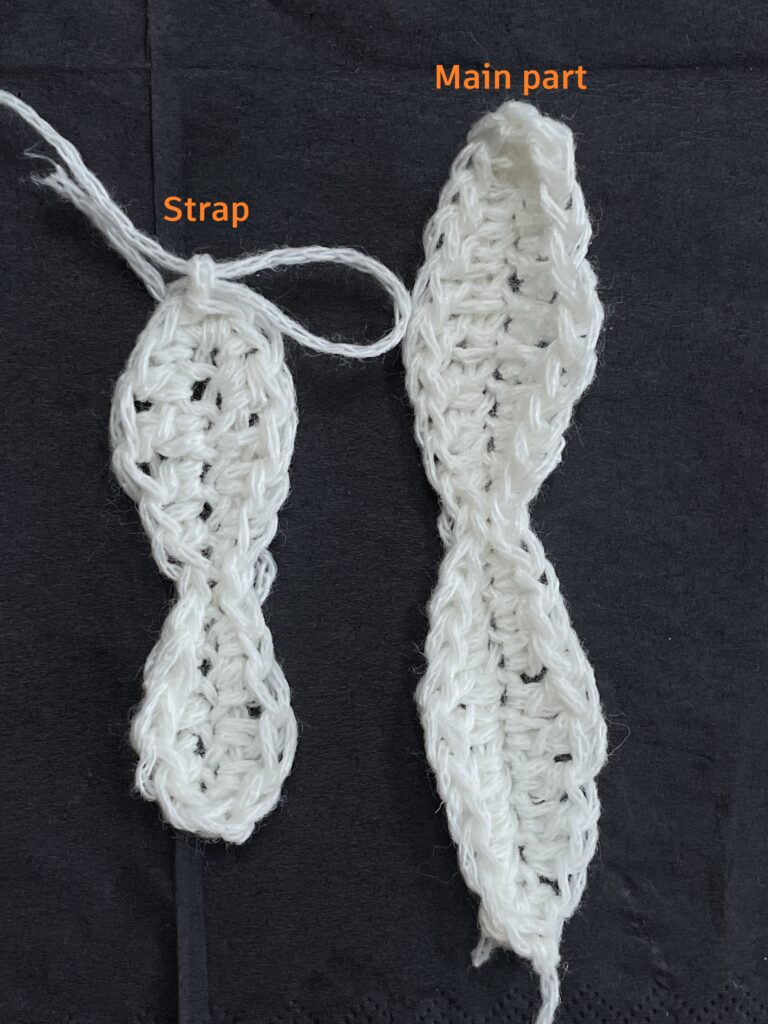
HOW TO CROCHET THE BOW (x2) (use 3 mm hook)
Main part (x2):
FC: 21ch
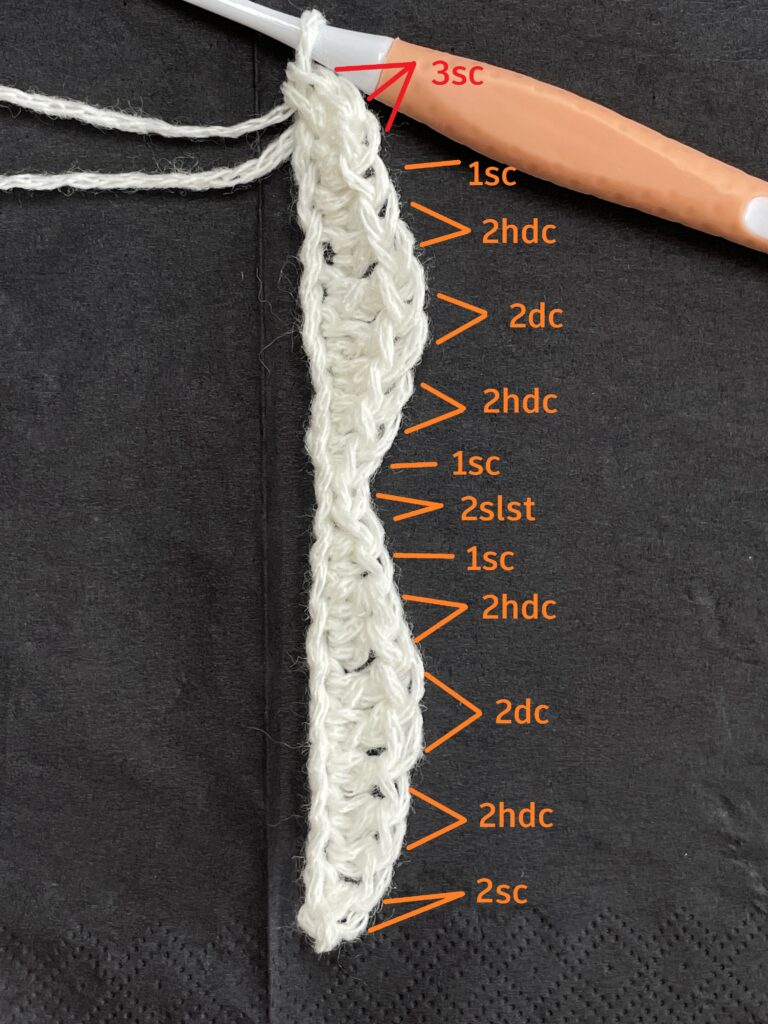
Row: skip first st, 2sc, 2hdc, 2dc, 2hdc, 1sc, 2slst, 1sc, 2hdc, 2dc, 2hdc, 1sc, do 3sc in the last st. (picture 26)
Continue the same stitches around the fc: 1sc, 2hdc, 2dc, 2hdc, 1sc, 2slst, 1sc, 2hdc, 2dc, 2hdc, 2sc. Slst in the first sc, ch1. Leave long tail of yarn. (we will use the tail to form and secure the bow later) (picture 27)
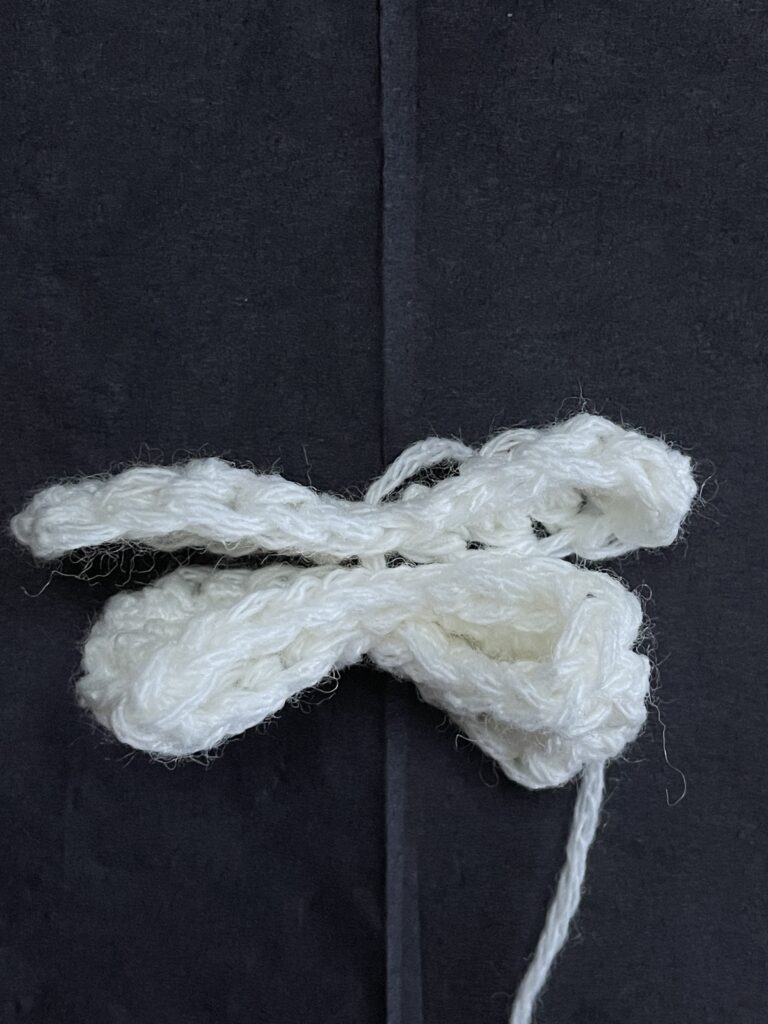
Straps (x2):
FC: 13ch
Row: 1sc, 1hdc, 1dc, 1hdc, 1sc, 2slst, 1sc, 1hdc, 1dc, 1hdc, do 2 sc in the last st. Continue the same stitches around the fc: 1hdc, 1dc, 1hdc, 1sc, 2slst, 1sc, 1hdc, 1dc, 1hdc, 1sc, slst in the first sc, ch1. (picture 27)
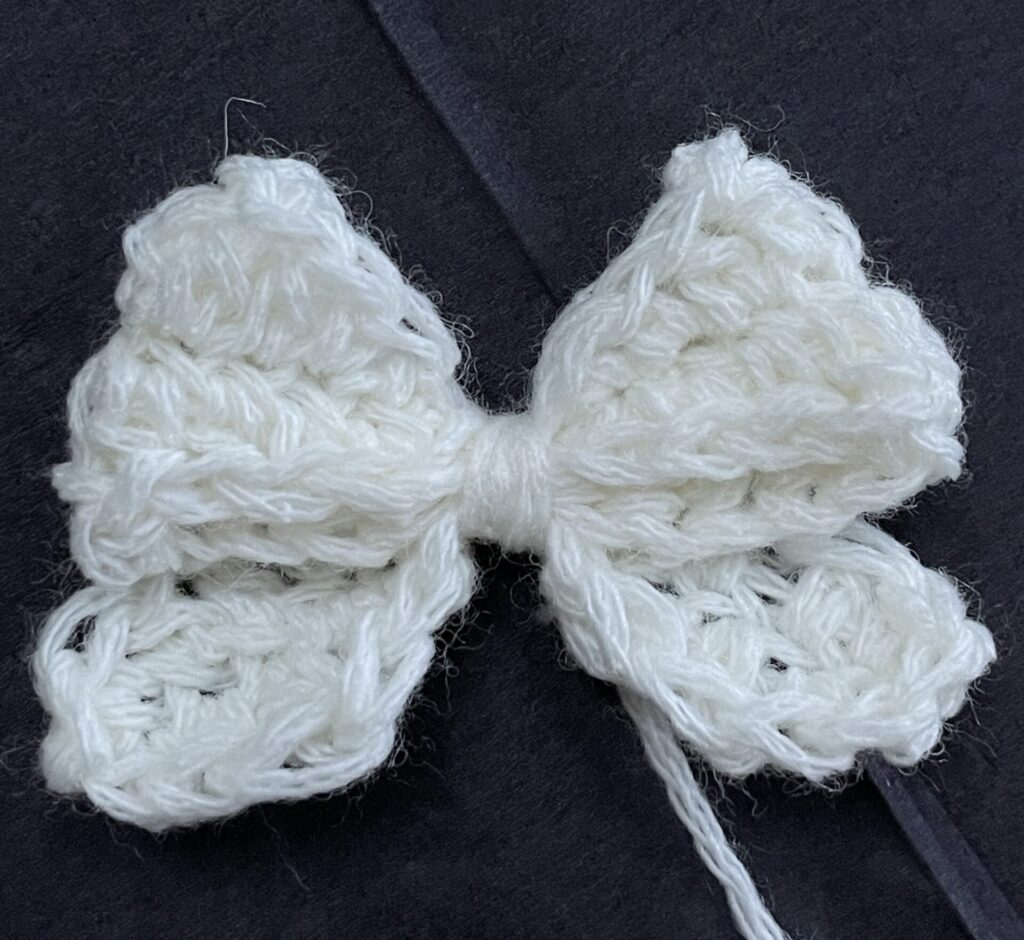
HOW TO CONNECT THE BOW
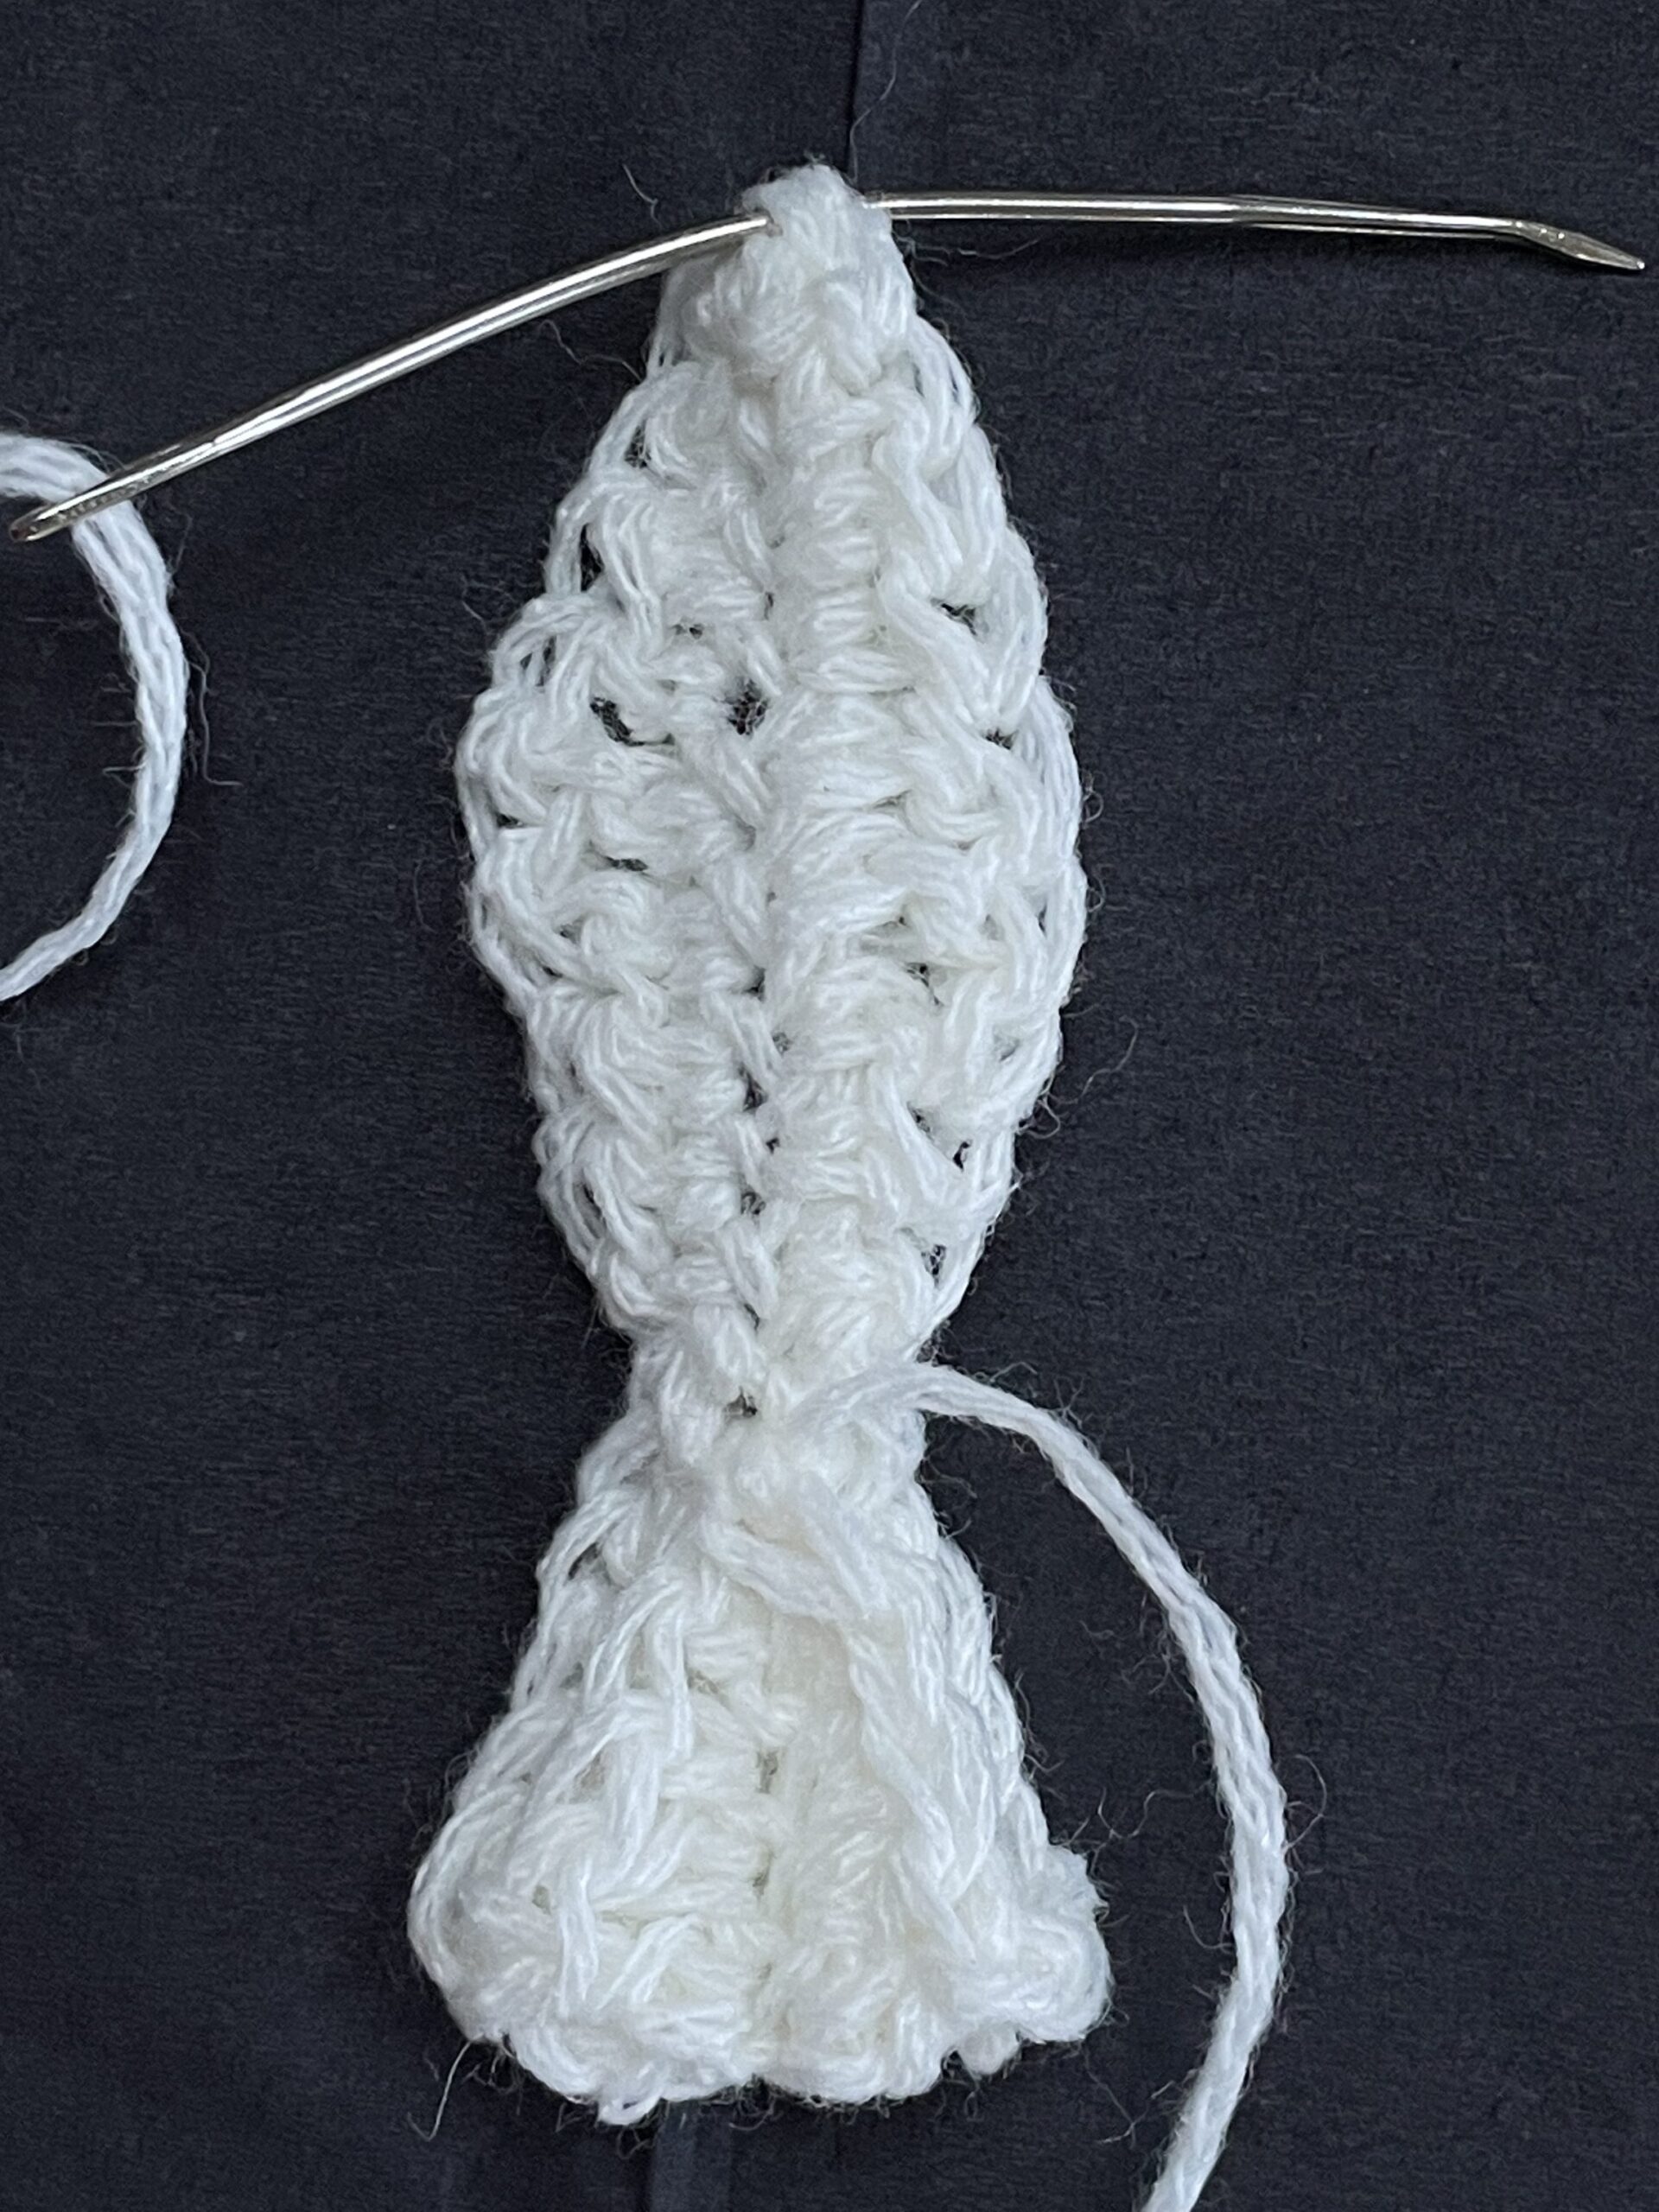
- Take the main part of the bow, insert a needle in the left tail, and put a needle in the middle (between 2slst). One side should be folded in half and create half of the bow. Secure it. (picture 29)
- Go through the other end stitch and in the middle again, to make a full bow. (picture 30, 31)
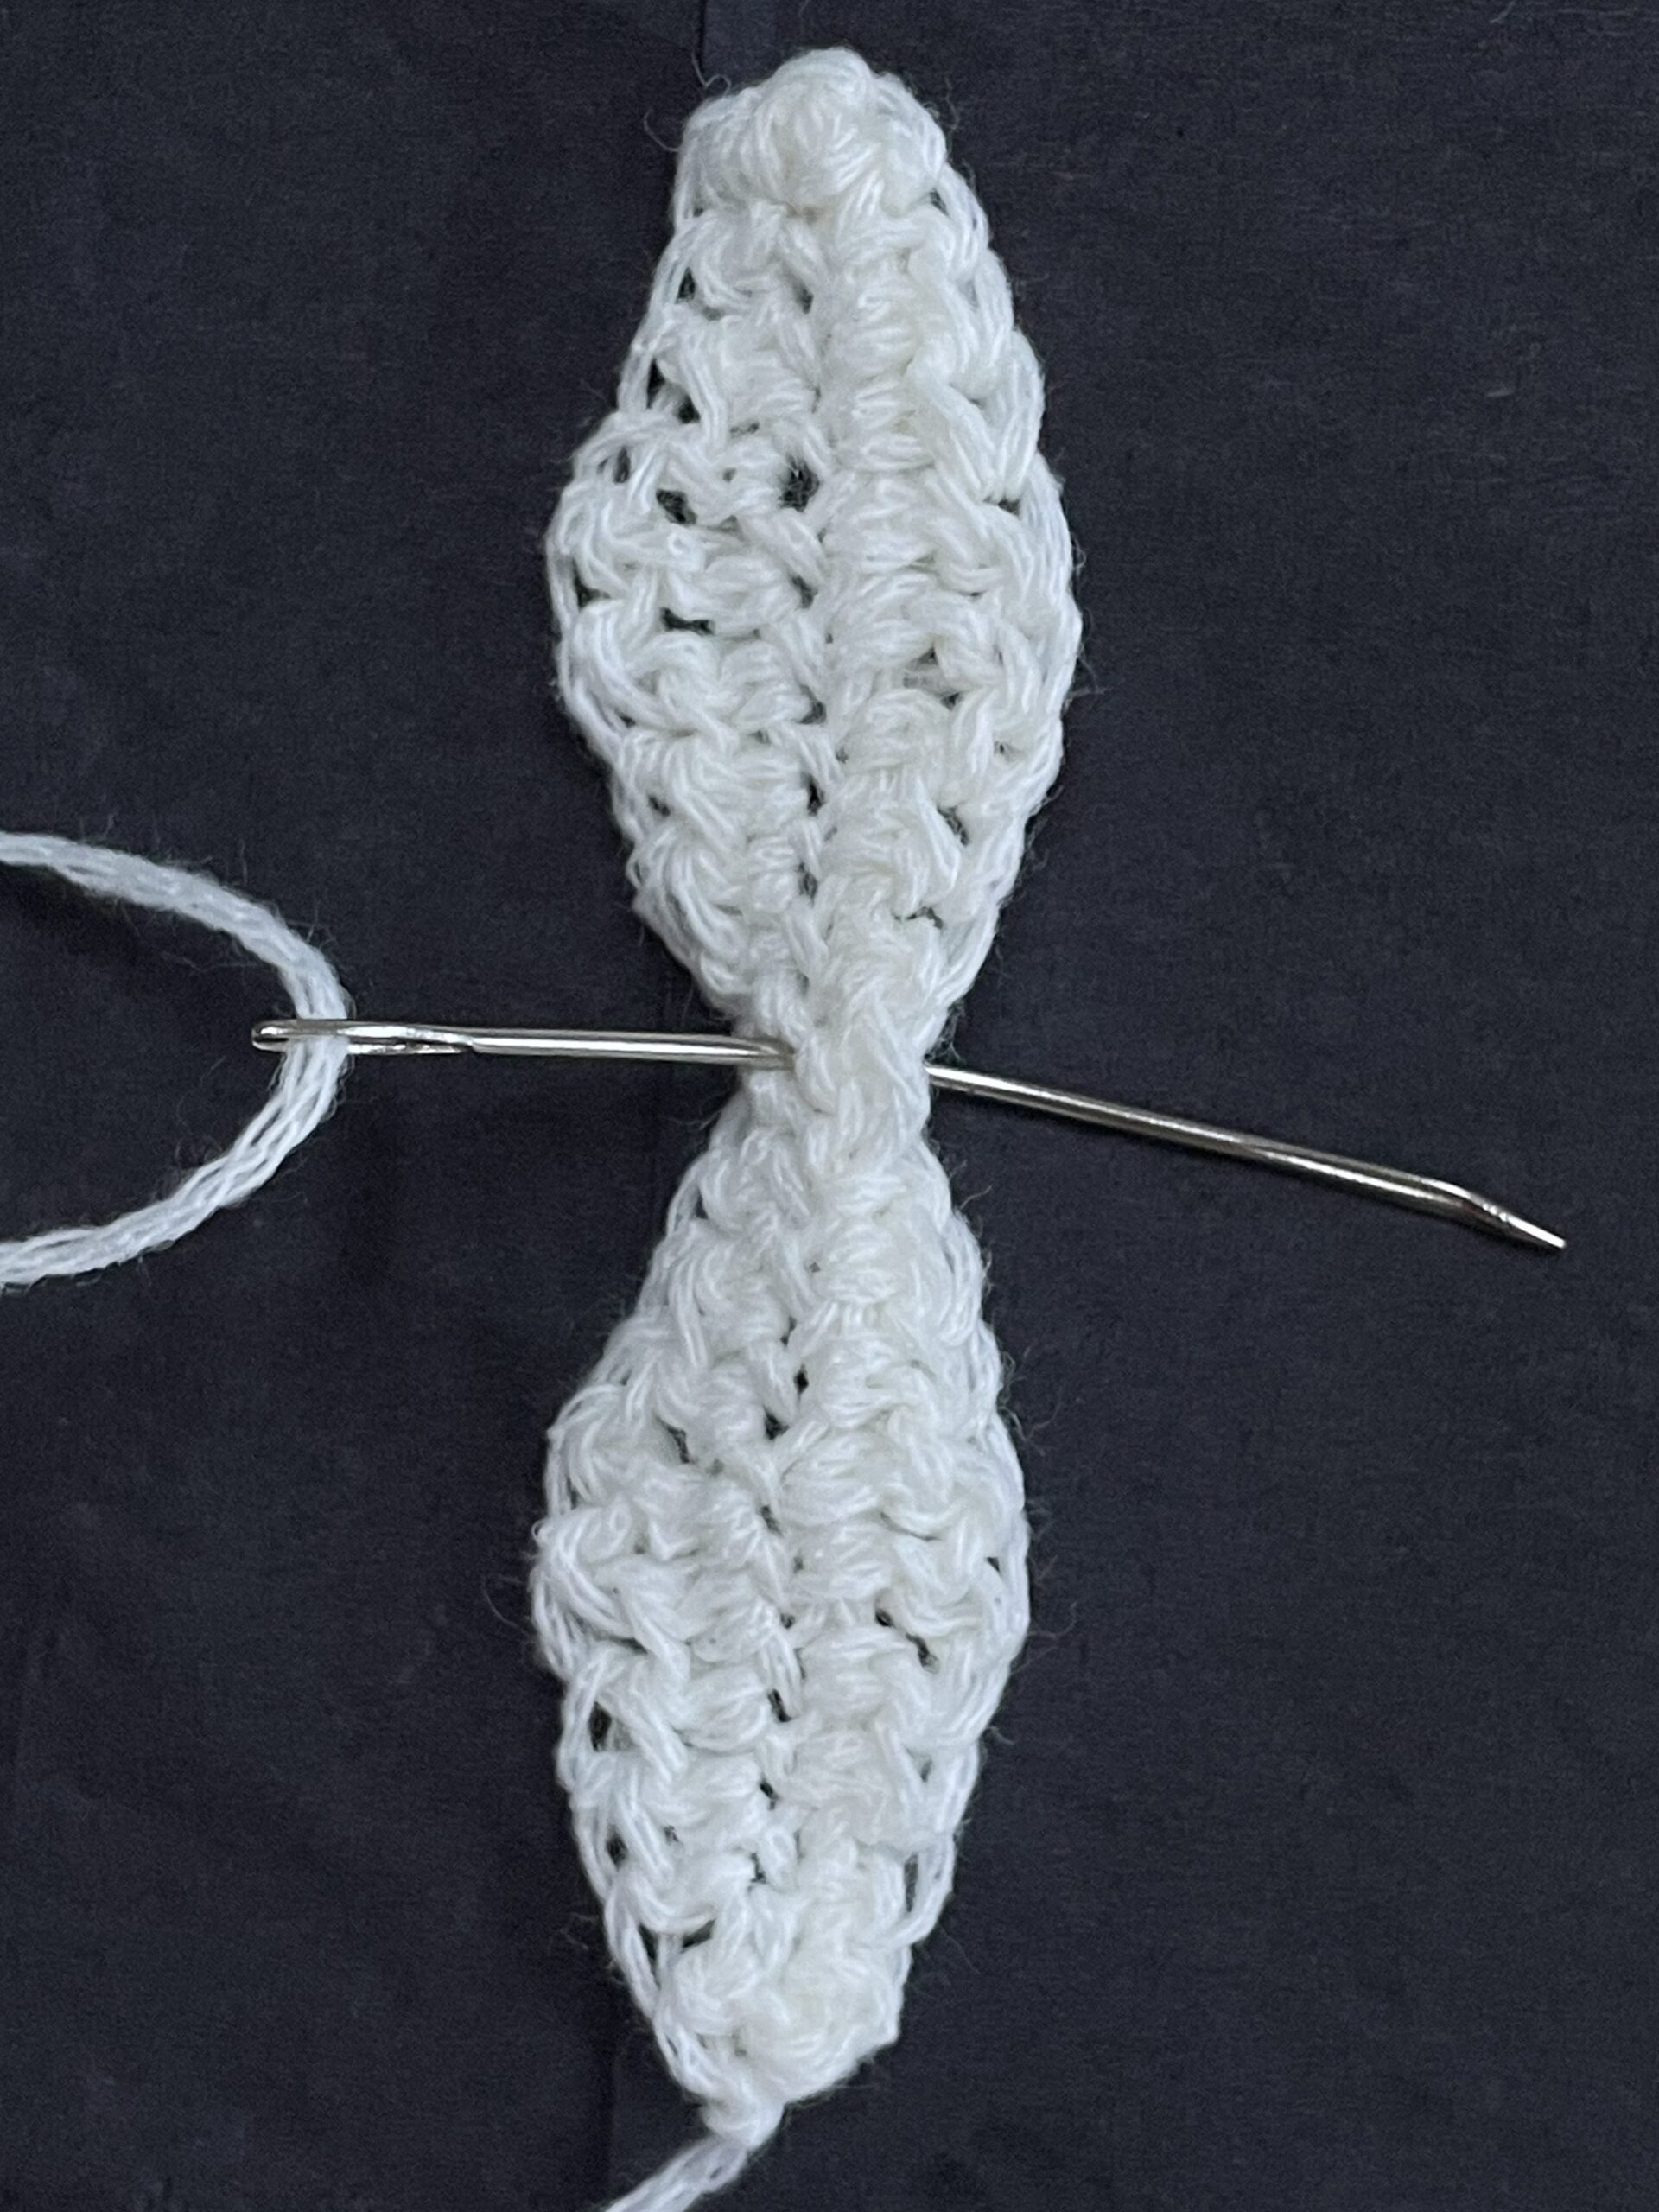
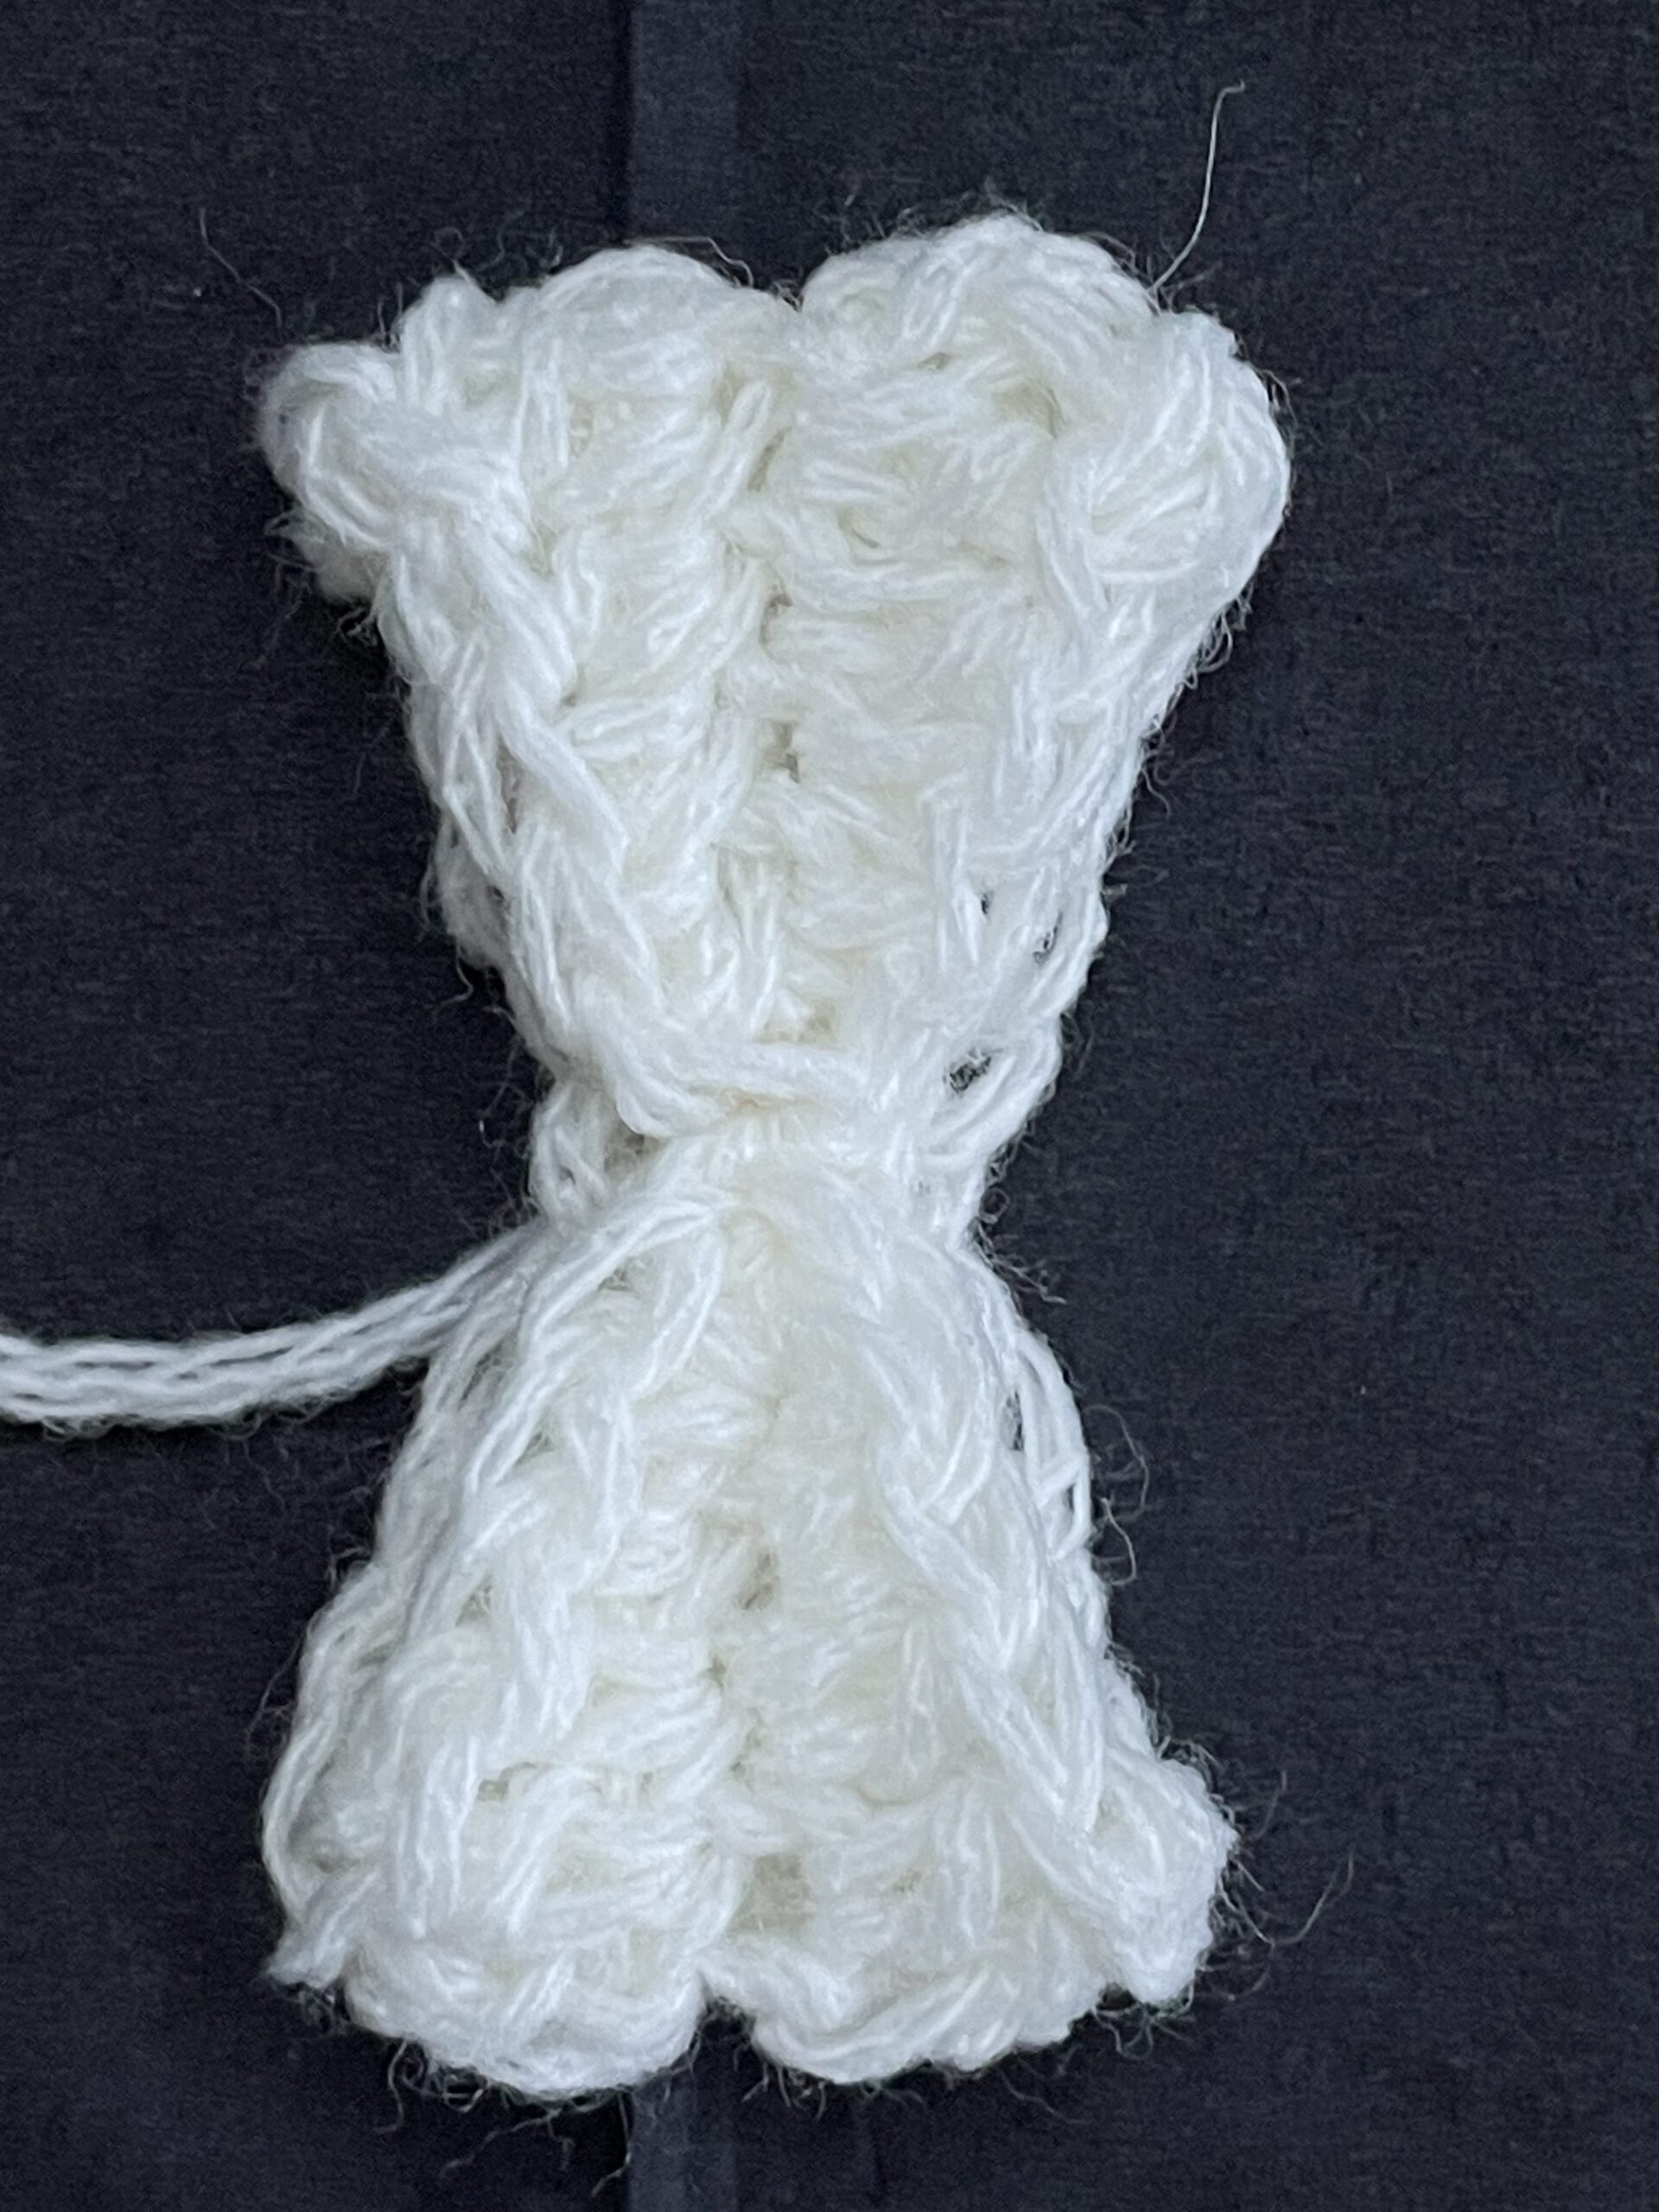
- Put a strap piece behind the bow you just formed. (picture 32)
- Go tightly around both pieces with the yarn tail about 6 times to make the middle part.
- Attach the finished bow to the booty. I placed it in front of the ears connection to cover the bulky base of it. Also, attach bow straps to the top of the foot. for better shaping.
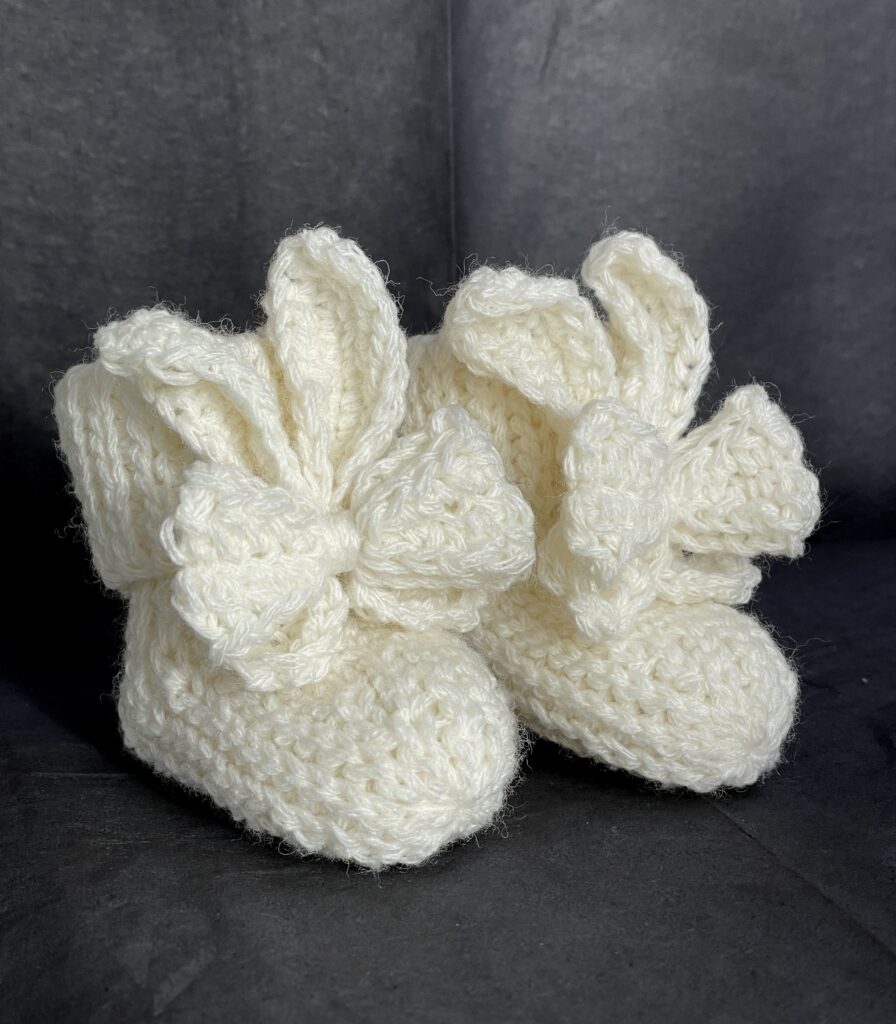
And here you have it! Adorable Crochet Bunny Baby Booties are done.
You did a fantastic job!
Hope you enjoyed this pattern and happy crocheting! ♥
[…] 4. Click here to get this baby bunny booties FREE pattern […]